Automatic transaxle — removal and installation
Removal
Note: The manufacturer requires the engine and transaxle to be removed as a unit, then separated once they are out of the vehicle.
1. Disconnect the negative cable from the battery and remove the battery (see Engine electrical systems).
2. With the vehicle raised on a hoist, remove the torque converter access cover (see illustration), then remove the drive plate-to-torque converter bolts.
7.2 Carefully pry the torque converter access cover out to expose the converter bolts
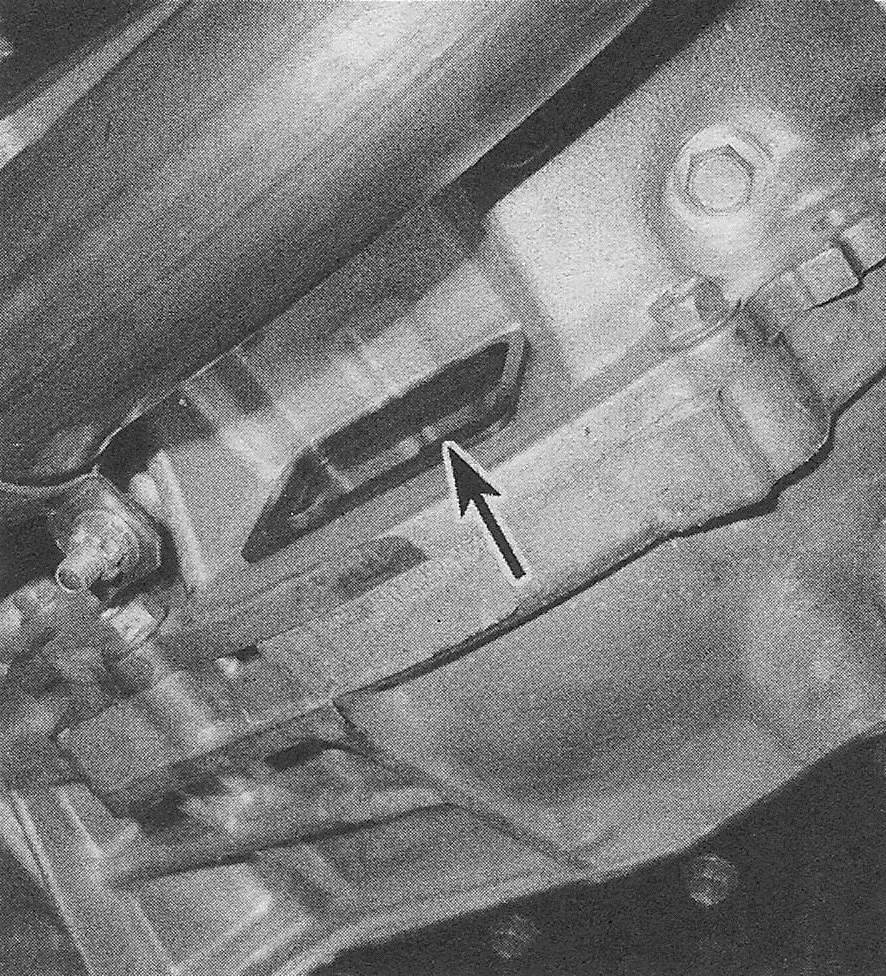
Note: Rotate the engine using the crankshaft pulley bolt to gain access to each bolt. Take note of the bolts as they are removed; on some models, one of the bolts is color coded and must be reinstalled in the same location.
3. Remove the engine and transaxle as a unit. Caution: Do not depress the clutch pedal while the transaxle is removed from the vehicle.
Warning: Do not place any part of your body under the transaxle assembly when it’s supported only by a hoist or other lifting device.
4. With the engine and transaxle lowered, support the transaxle with a floor jack. Place a block of wood on the jack head to prevent damage to the transaxle. Safety chains will help steady the transaxle on the jack.
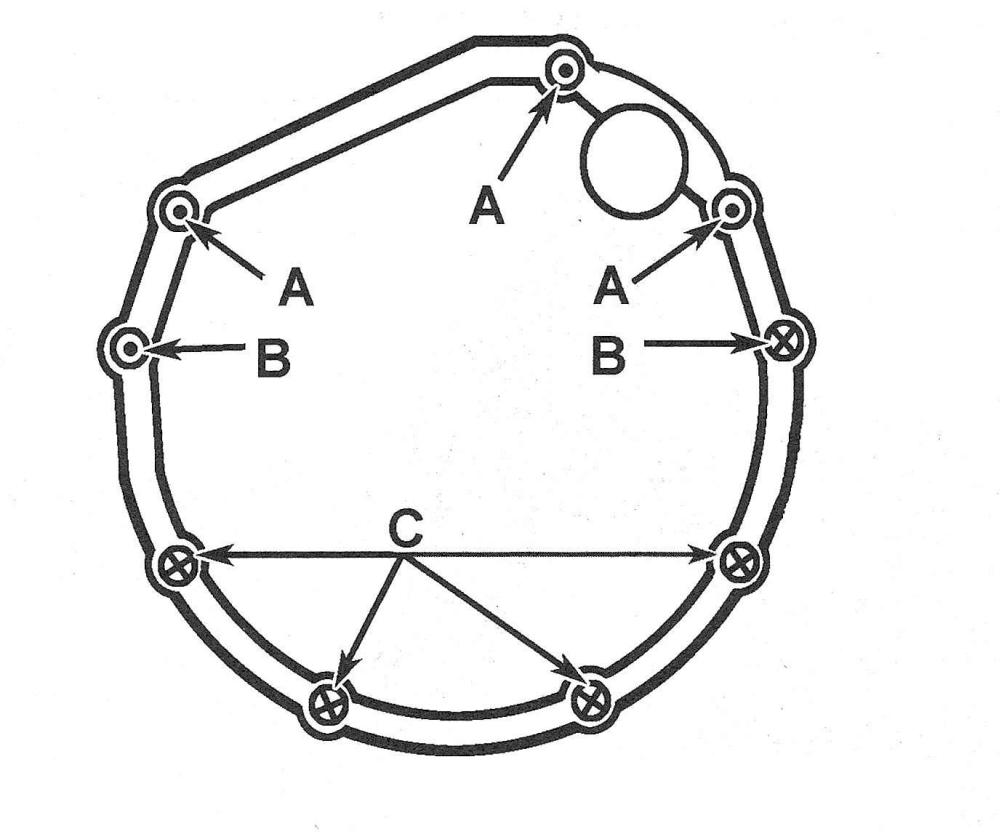
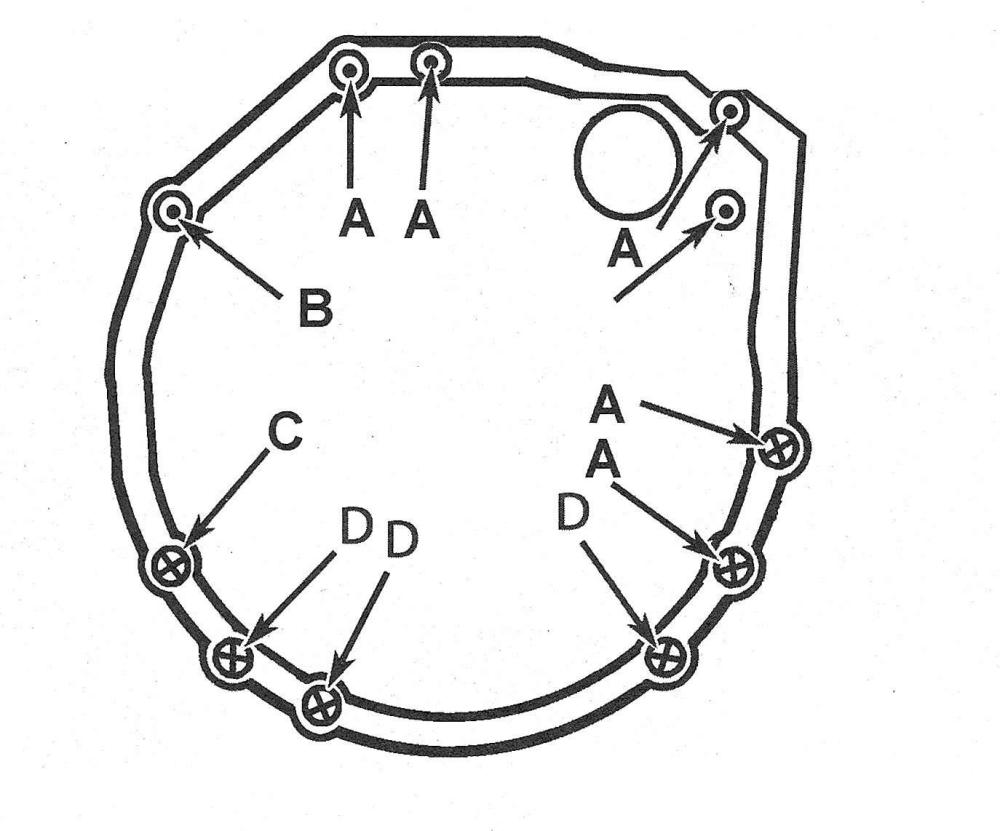
5. Remove the transaxle-to-engine bolts (see illustrations).
7.5a Transaxle mounting bolt locations — four-cylinder models
7.5b Transaxle mounting bolt locations — V6 models
6. Recheck to be sure nothing is connecting the engine or the transaxle. Disconnect and label anything still remaining.
7. Move the transaxle assembly away from the engine and carefully place the transaxle assembly on the floor onto wood blocks. Leave enough room for a floor jack underneath the transaxle.
8. Check the engine and transaxle mounts and the engine control rod. If any of these components are worn or damaged, replace them.
Installation
9. If removed, install the torque converter on the transaxle input shaft. Make sure the converter hub splines are properly engaged with the splines on the input shaft and front pump. Apply a coat of multi-purpose grease to the hub of the torque converter
10. With the transaxle secured to the jack as on removal, raise it into position and then carefully slide it forward. Do not use excessive force to install the transaxle — if it does not slide into place, readjust the angle of the transaxle so it is level.
Caution: Do NOT use transaxle-to-engine bolts to force the engine and transaxle into alignment. Doing so could crack or damage major components. If you experience difficulties, have an assistant help you line up the dowel pins on the block with the transaxle. Some wiggling of the engine and/or the transaxle will probably be necessary to secure proper alignment of the two.
11. Install the transaxle-to-engine bolts. Tighten the bolts to the torque listed in this Chapter’s Specifications (see illustrations 7.5a and 7.5b).
12. Install the engine and transaxle unit and tighten all mounting bolts and nuts securely. Tighten the drive plate-to-torque converter bolts to the torque listed in this Chapter’s Specifications.
13. Reinstall the remaining components in the reverse order of removal.
14. Remove the jack and hoist and lower the vehicle. Tighten the wheel lug nuts to the torque listed in the Tune-up and routine maintenance Specifications.
15. Add the specified amounts of coolant, oil and transaxle fluid (see Tune-up and routine maintenance).
16. Connect the negative battery cable. Start the engine and check for proper operation and leaks.
17. Shut off the engine and recheck the fluid levels. Road test the vehicle to check for proper transaxle operation and check for leakage.