Parking brake shoes — replacement
Warning: Dust created by the brake system is hazardous to your health. Never blow it out with compressed air and don’t inhale any of it. An approved filtering mask should be worn when working on the brakes. Do not, under any circumstances, use petroleum-based solvents to clean brake parts. Use brake system cleaner only!
Warning: Parking brake shoes must be replaced on both wheels at the same time -never replace the shoes on only one wheel.
1. Remove the brake disc (see Brake disc — inspection, removal and installation).
2. Inspect the thickness of the lining mate- rial on the shoes. If the lining has worn down to 1/32-inch or less, the shoes must be replaced.
3. Remove the hub and bearing assembly (see Suspension and steering systems).
Note: It is possible to perform the shoe replacement procedure without removing the hub and bearing assembly, although working room is limited.
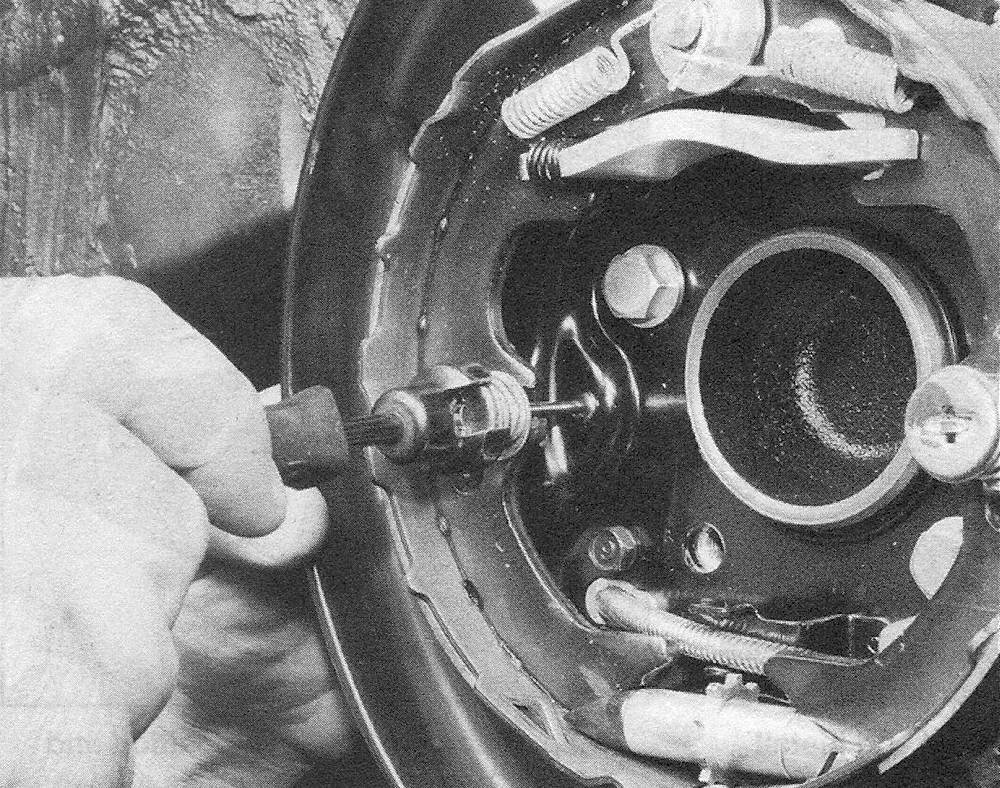
4. Wash off the brake parts with brake system cleaner (see illustration).
7.4 Before disassembling it, be sure to wash the parking brake assembly with brake cleaner

5. Follow the accompanying illustrations for the brake shoe replacement procedure (see illustrations 7.5a through 7.5u). Be sure to stay in order and read the caption under each illustration.
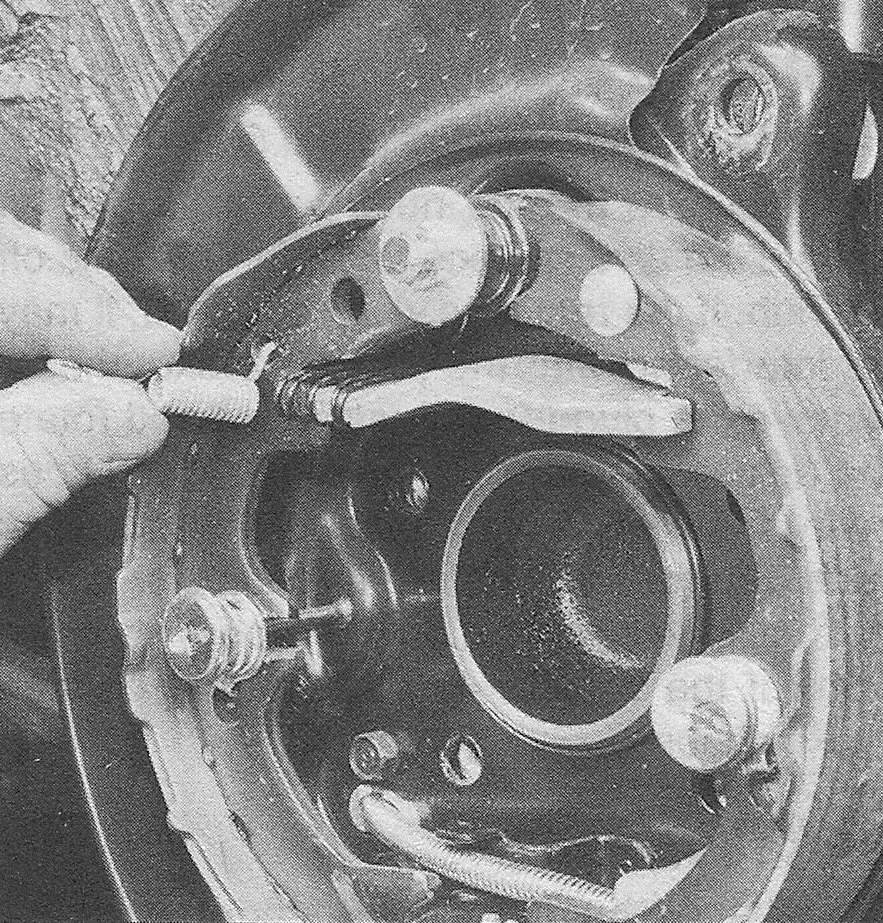
7.5a Remove the rear parking brake shoe return spring from the anchor pin.

7 .5b … and unhook it from the rear shoe

7.5c Remove the front parking brake shoe return spring from the anchor pin.

7.5d. and unhook it from the front shoe
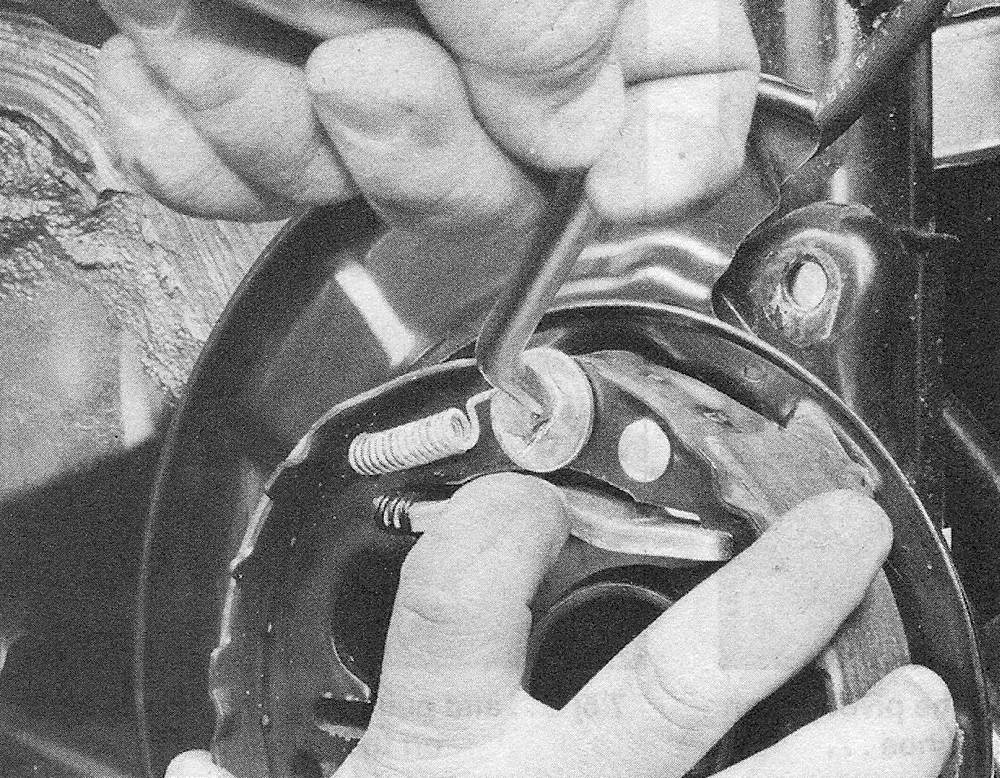
7.5e Remove the rear shoe hold-down spring and pull out the pin

7.5f Remove the shoe strut from between the shoes

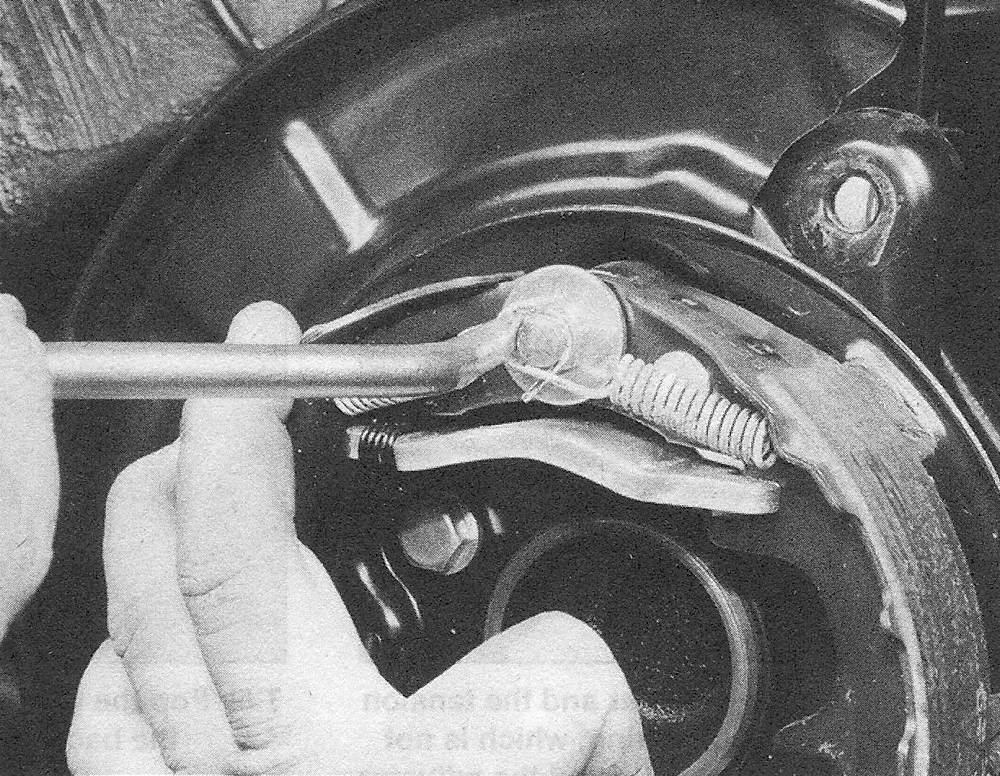
7.5g Remove the front shoe hold-down spring and pull out the pin

7.5h Remove the adjuster and the tension spring (the tension spring, which is not visible in this photo, is behind the adjuster and is attached to both shoes)
")
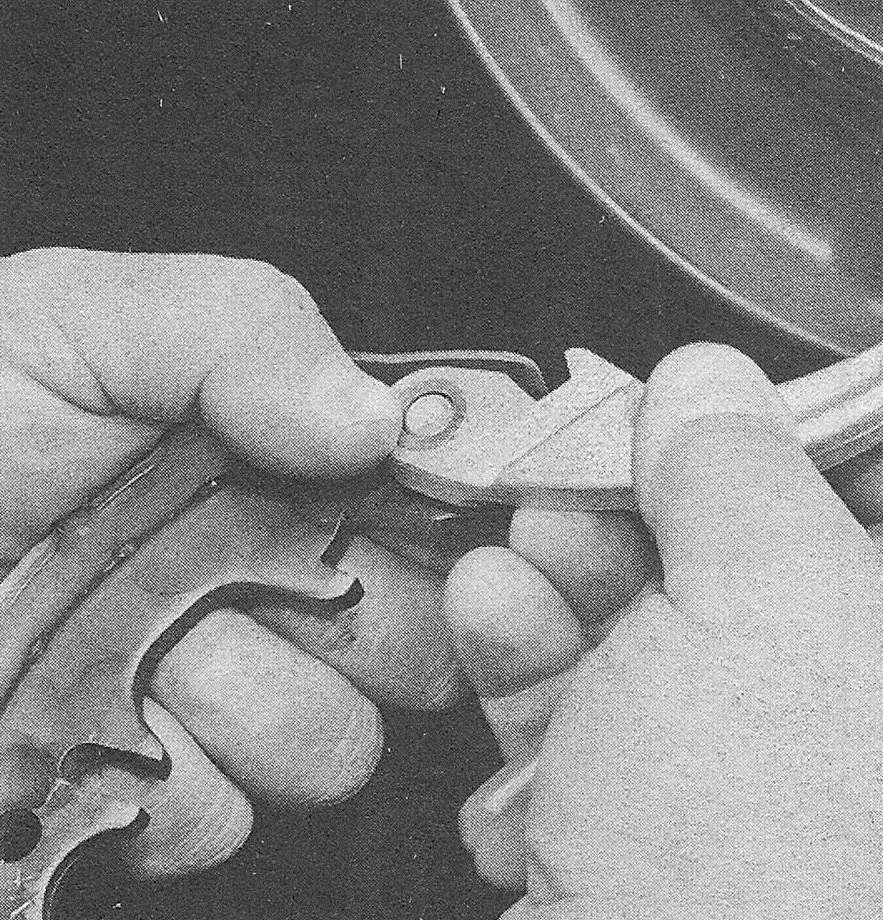
7.5i Pop the C-washer off the pivot pin on the back of the rear shoe.

7.5j . and pull the parking brake lever off the pivot pin
7.5k Apply a thin coat of high-temperature grease to the contact surfaces of the backing plate

7.51 Slide the parking brake lever onto the pivot pin and install a new C-washer

7.5m Attach the tension spring to the back side of the rear shoe …

7.5n … and to the back side of the front shoe

7.5o Flip the shoes around and install the adjuster; make sure both ends of the adjuster are properly engaged with the shoes as shown

7.5p Place the shoes in position and, install the strut and spring as shown; make sure the ends of the strut are properly engaged with the shoes as shown

7.5q Install the front shoe return spring …
7.5r … and the rear shoe return spring
7.5s Install the rear shoe hold -down spring

7.5t .and the front shoe hold-down spring
7.5u This is how the parking brake assembly should look when you’re done

6. Install the brake disc. Temporarily thread three of the wheel lug nuts onto the studs to hold the disc in place.
7. Remove the hole plug from the brake disc. Adjust the parking brake shoe clearance by turning the adjuster star wheel with a brake adjusting tool or screwdriver until the shoes contact the disc and the disc can’t be turned (see illustrations 6.6a and 6.6b). Back off the adjuster eight notches, then install the hole plug. Turn the disc and verify that the shoes don’t drag.
8. Install the caliper mounting bracket (see illustration 6.2b) and brake caliper (see Disc brake caliper — removal and installation). Be sure to tighten the bolts to the torque listed in this Chapter’s Specifications.
9. Install the wheel and tighten the lug nuts to the torque specified in Tune-up and routine maintenance.
10. If the vehicle is equipped with a parking brake lever, pull up on the lever and count the number of clicks that it travels. It should be between five and eight clicks — if it’s not, adjust the parking brake as described in Parking brake — adjustment.
11. To bed the shoes to the drum, drive the vehicle at approximately 30 mph on a dry, level road. If the vehicle has a parking brake lever, push in on the parking brake release button and pull up slightly on the lever with about 20 pounds of force; if the vehicle has a pedal-type parking brake system, apply the pedal with about 33 pounds of force. Drive the vehicle with the parking brake applied like this for 1/4-mile. Repeat this procedure two or three times, allowing the brakes to cool between applications.