Air conditioning compressor — removal and installation
Warning: The air conditioning system is under high pressure. Do not loosen any hose fittings or remove any components until the system has been discharged. Air conditioning refrigerant must be properly discharged into an EPA-approved recovery/recycling unit by a dealer service department or an automotive air conditioning repair facility. Always wear eye protection when disconnecting air conditioning system fittings
Warning: The engine must be completely cool before draining the cooling system. Caution: The receiver/drier should be replaced whenever the compressor is replaced.
1. Have the refrigerant discharged by an automotive air conditioning technician.
2. Disconnect the cable from the negative battery terminal (see Engine electrical systems).
3. Raise the front of the vehicle and sup- port it securely on jack stands, then remove the passenger’s side front wheel and the lower inner fender corner splash shield (s).
4. Drain the cooling system (see Tune-up and routine maintenance).
5. Remove the drivebelt from the compressor (see Tune-up and routine maintenance).
6. Remove the alternator (see Engine electrical systems).
2009 and earlier four-cylinder models
7. Detach the upper radiator hose from the thermostat housing.
8. Remove the clamp that supports the refrigerant lines.
2010 and later four-cylinder models and all V6 models
9. Remove the air cleaner assembly and air inlet duct (see Fuel and exhaust systems).
10. Remove the front bumper (see Body).
11. Remove the radiator (see Radiator and coolant reservoir — removal and installation).
All models
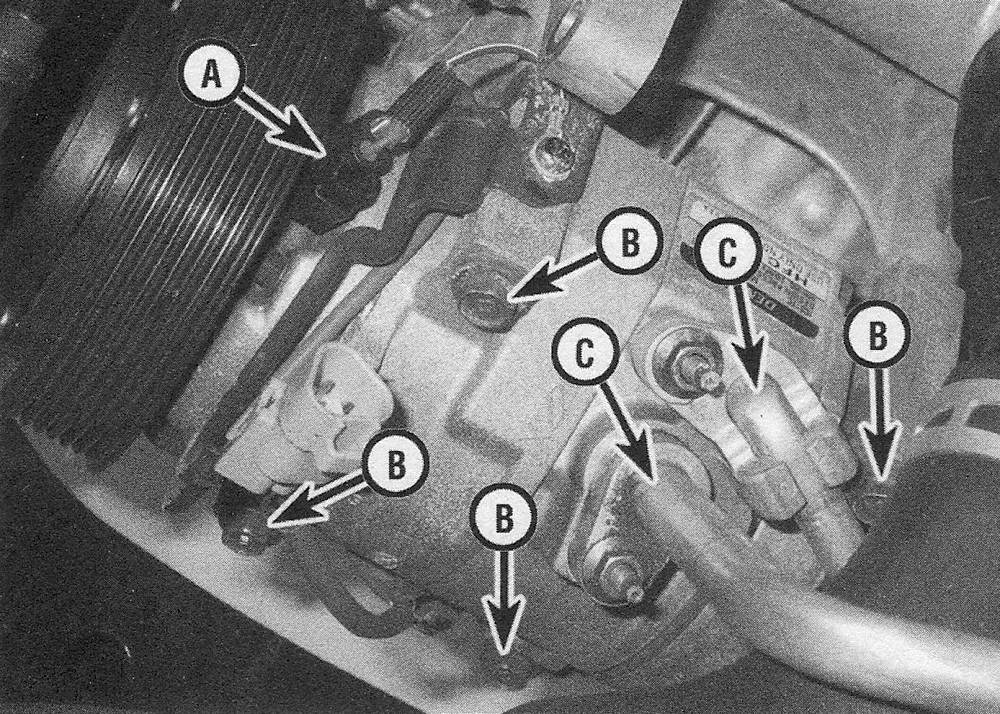
12. Detach the electrical connector and the refrigerant lines (see illustration).
13.12 Compressor details — 2009 and earlier four-cylinder models (shown with alternator removed), other models similar
A Electrical connector
B Mounting bolts
C Refrigerant lines
13. Unbolt the compressor and lift it from the vehicle.
14. If a new or rebuilt compressor is being installed, follow the directions which come with it regarding the proper level of oil prior to installation.
15. Installation is the reverse of removal. Replace any 0-rings with new ones specifically made for the purpose and lubricate them with refrigerant oil.
16. Have the system evacuated, recharged and leak tested by the shop that discharged it.