Water pump — replacement
Warning: Wait until the engine is completely cool before beginning this procedure. Warning: Do not allow antifreeze to come in contact with your skin or painted surfaces of the vehicle. Rinse off spills immediately with plenty of water. Antifreeze is highly toxic if ingested. Never leave antifreeze lying around in an open container or in puddles on the floor; children and pets are attracted by its sweet smell and may drink it. Check with local authorities on disposing of used antifreeze. Many communities have collection centers, which will see that antifreeze is disposed of safely. Never dump used antifreeze on the ground or into drains.
1. Disconnect the cable from the negative battery terminal (see Engine electrical systems) and drain the cooling system (see Tune-up and routine maintenance).
2009 and earlier four-cylinder models
2. Remove the engine covers, radiator support trim cover and coolant reservoir (see Radiator and coolant reservoir — removal and installation).
3. Loosen the water pump pulley bolts (see illustration), then remove the drivebelt and tensioner (see Tune-up and routine maintenance). Now unscrew the bolts and remove the pulley.
7.3 Using a pin spanner to hold the water pump pulley, remove the pulley mounting bolts
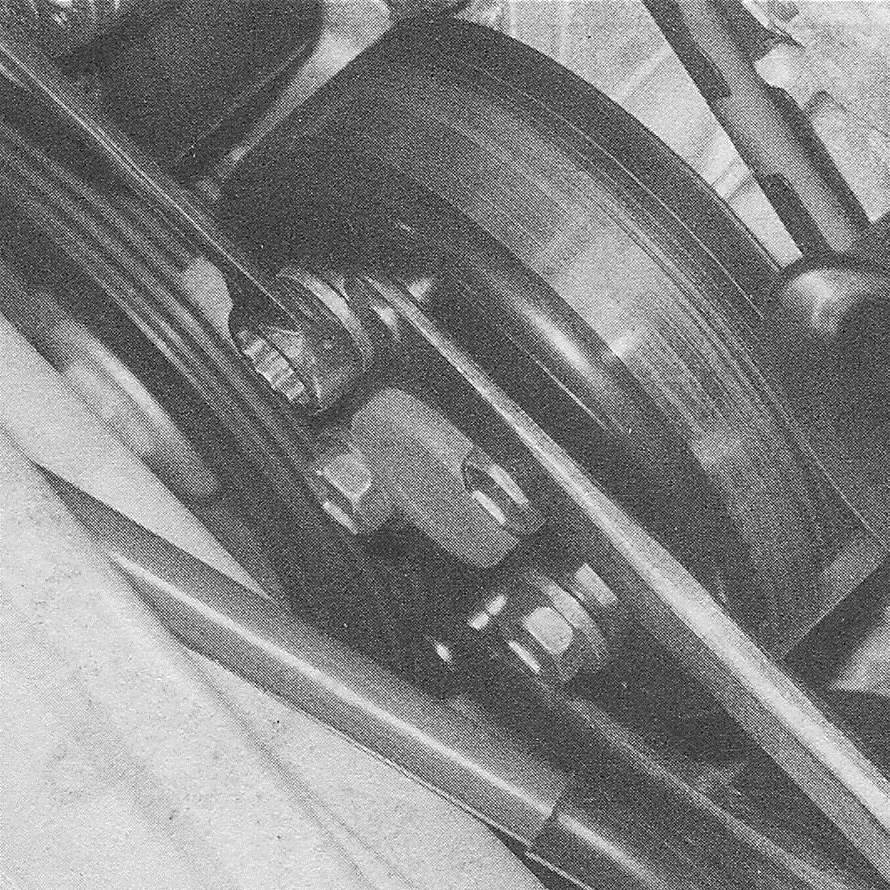
Note: If the drivebelt doesn’t prevent the pulley from turning when loosening the bolts, use a pin spanner to immobilize it.
4. Remove the alternator (see Engine electrical systems).
5. Remove the wiring harness from the clamp on the water pump and harness bracket.
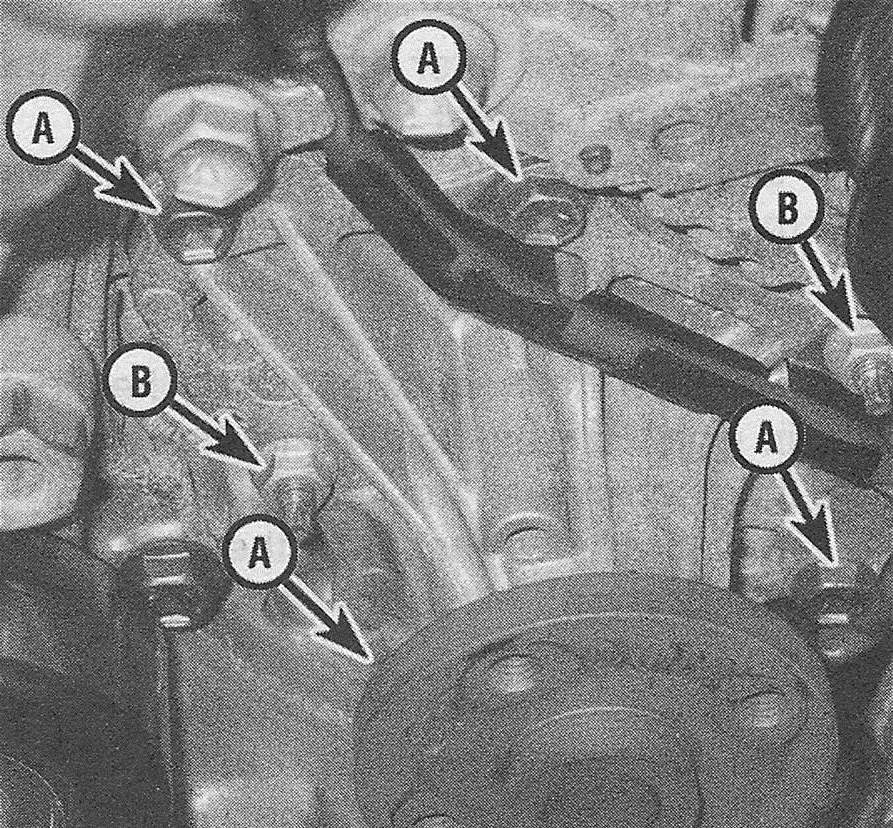
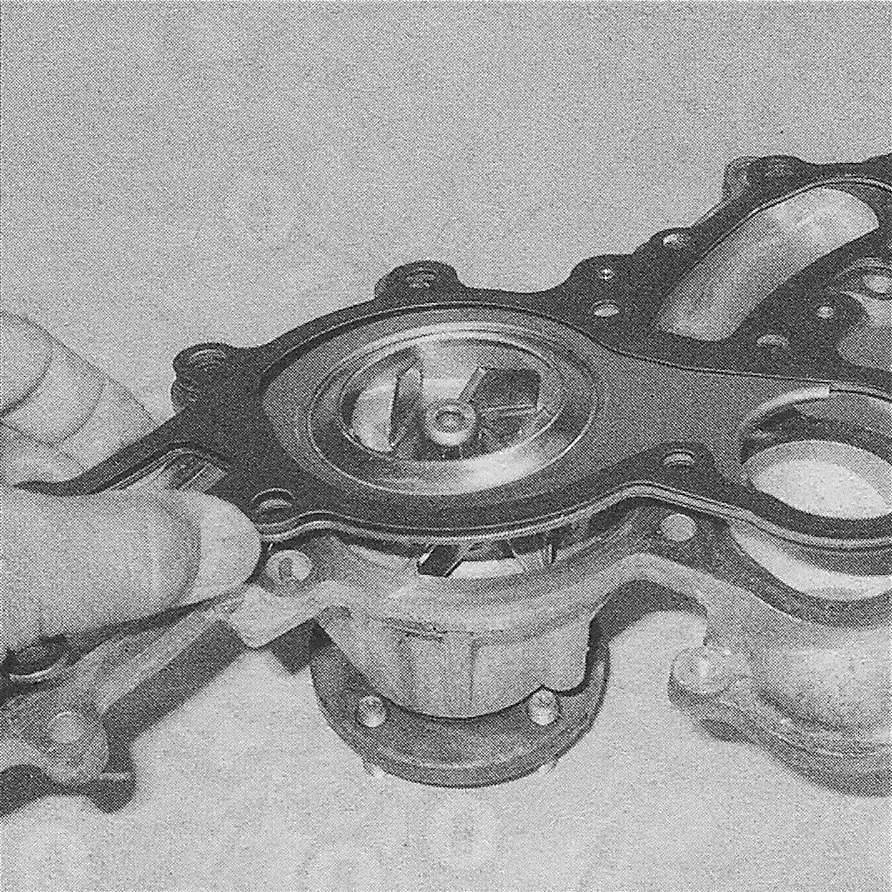
6. Remove the water pump mounting fasteners (see illustration) and pry the water pump from the housing.
7.6 The water pump on 2009 and earlier four-cylinder models is retained by four bolts (A, one lower bolt not seen in this photo) and two nuts (B)
7. Thoroughly clean all sealing surfaces, removing all traces of old gasket material.
8. Installation is the reverse of removal. Be sure to tighten the fasteners to the torque listed in this Chapter’s Specifications.
9. Refill the cooling system (see Tune-up and routine maintenance), run the engine and check for leaks and proper operation.
2010 and later four-cylinder models
10. Remove the engine covers, radiator support trim cover and coolant reservoir (see Radiator and coolant reservoir — removal and installation).
11. Remove the drivebelts (see Tune-up and routine maintenance).
12. Remove the alternator (see Engine electrical systems) and tensioner for the alternator belt (see Tune-up and routine maintenance).
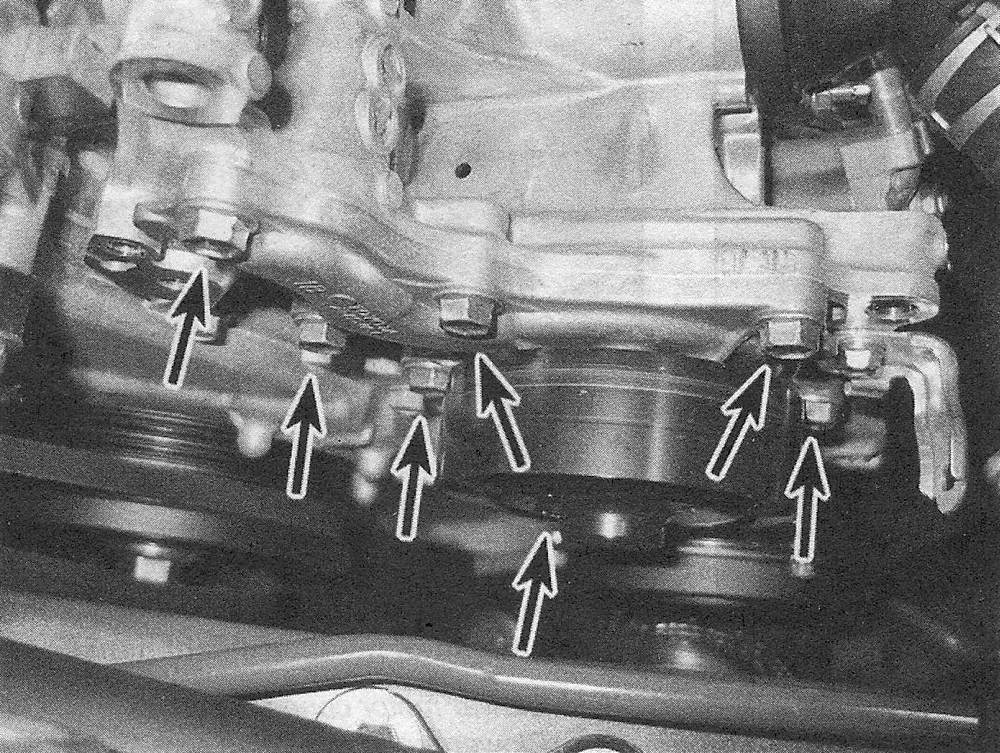
13. Remove the water pump mounting fasteners, then remove the water pump from the housing (see illustration).
7.13 Water pump mounting details — 2010 and later four-cylinder models
14. Thoroughly clean all sealing surfaces, removing all traces of old gasket.
15. Installation is the reverse of removal. Be sure to tighten the fasteners to the torque listed in this Chapter’s Specifications.
16. Refill the cooling system (see Tune-up and routine maintenance), run the engine and check for leaks and proper operation.
V6 models
17. Remove the engine/transaxle assembly.
18. Remove the alternator (see Engine electrical systems).
19. Remove the six bolts and the upper front engine mount bracket.
20. Remove both the front and rear drive-belt idler pulley assemblies. Keep them in order and note that the larger of the washers goes under the head of the pulley bolt. The smaller goes between the pulley and the engine block.
21. Remove the five bolts and the drivebelt tensioner.
22. Remove the thermostat housing (see Thermostat — replacement).
23. Hold the water pump pulley with a special pin spanner wrench. If you don’t have one, you can use a chain wrench or strap wrench instead, Remove the pulley mounting bolts and pulley.
24. Remove the water pump mounting bolts (see illustration), then remove the water pump and gasket.
7.24 Locations of the different length water pump mounting bolts — V6 models
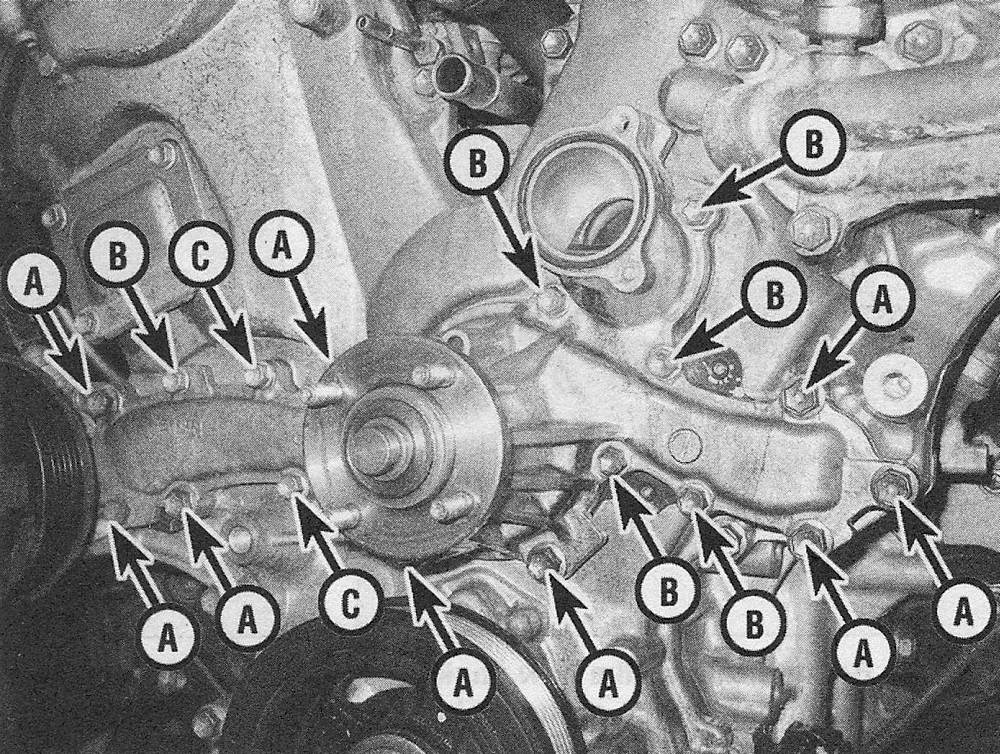
Note: The bolts that secure the water pump are of three different lengths. Make note of where each bolt is located so it may be reinstalled in the same location.
25. Thoroughly clean all sealing surfaces, removing all traces of old gasket and sealer.
26. Install a new gasket to the water pump (see illustration). Install the water pump and tighten the bolts and nuts to the torque listed in this Chapter’s Specifications.
7.26 Be sure to install a new gasket and clean the surface of the timing chain cover thoroughly
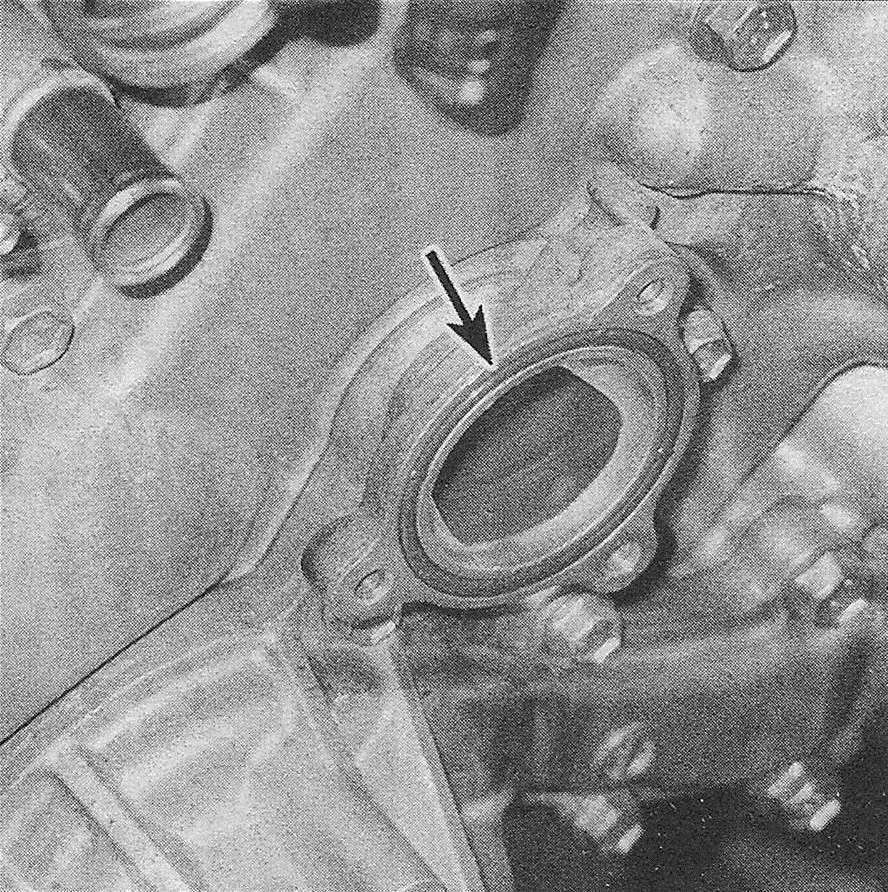
27. Install new gasket and 0-ring to the water inlet housing (see illustration).
7.27 After installing the water pump, be sure to replace the inlet housing 0-ring with a new one
28. Installation is the reverse of removal. Tighten the bolts to the torque listed in this Chapter’s Specifications.
29. Install the engine/transaxle assembly. Refill the cooling system (see Tune-up and routine maintenance) and run the engine, checking for leaks and proper operation.