Evaporative Emissions Control (EVAP) system — component replacement
Warning: Gasoline and gasoline vapors are extremely flammable, so take extra precautions when you work on any part of the fuel system. Don’t smoke or allow open flames or bare light bulbs near the work area, and don’t work in a garage where a gas-type appliance (such as a water heater or clothes dryer) is present. Since gasoline is carcinogenic, wear fuel-resistant gloves when there’s a possibility of being exposed to fuel, and, if you spill any fuel on your skin, rinse it off immediately with soap and water. Mop up any spills immediately and do not store fuel-soaked rags where they could ignite. When you perform any kind of work on the fuel system, wear safety glasses and have a Class B type fire extinguisher on hand.
EVAP canister purge valve
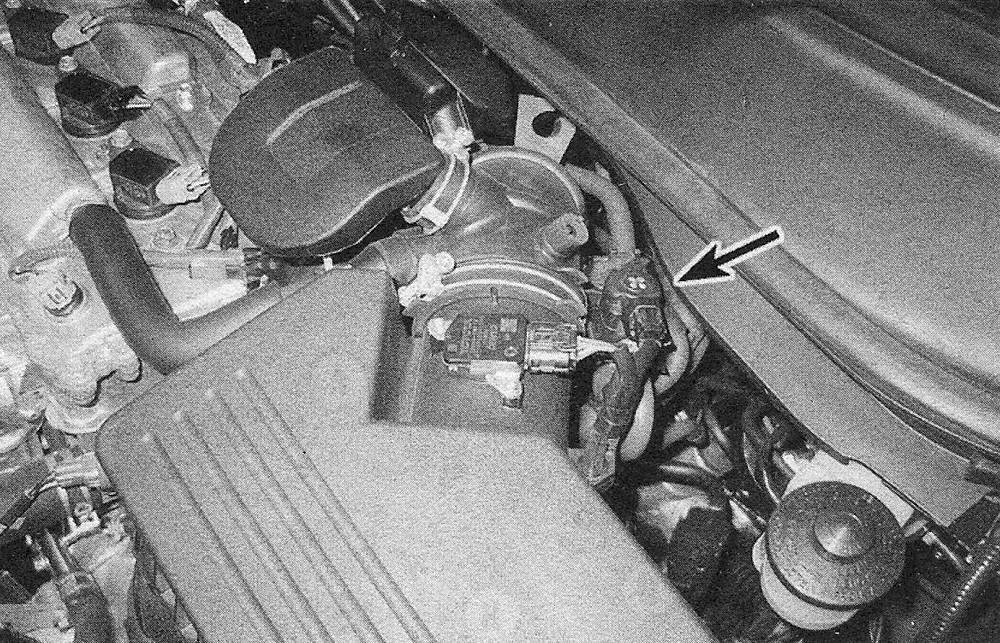
Note: On four-cylinder models, the EVAP canister purge valve is located behind the air filter housing, on the side of the intake duct; on V6 models, it’s located on the left end of the front-bank cylinder head.
1. Remove the engine cover (s).
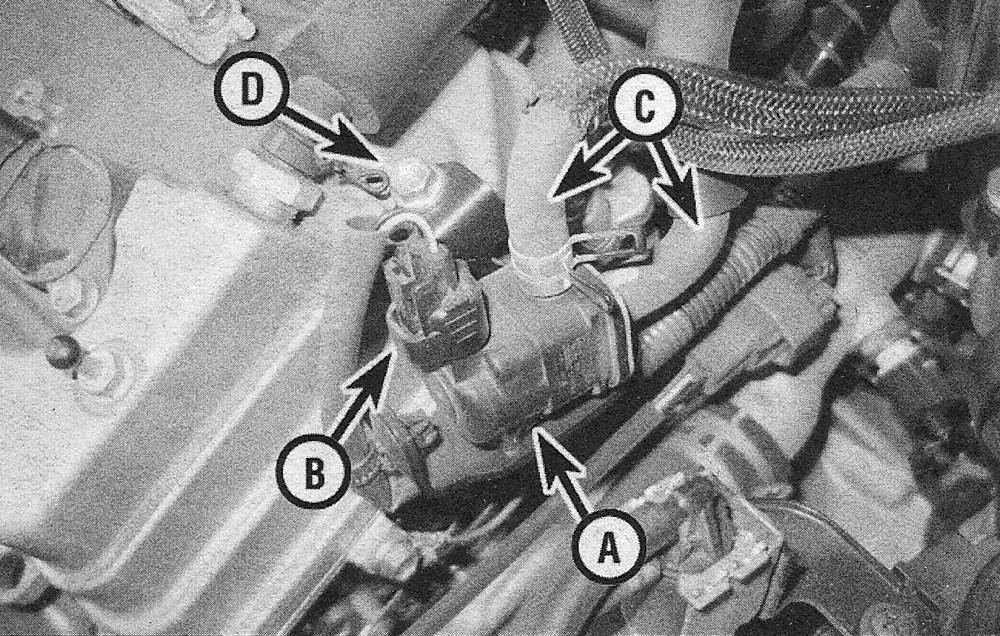
2. Disconnect the electrical connector from the purge valve (see illustrations).
17.2a EVAP canister purge valve location — four-cylinder models
17.2b EVAP canister purge valve details — V6 models
A Canister purge valve
B Electrical connector
C Vacuum lines
D Mounting bolt
3. Disconnect the EVAP hoses from the purge valve.
4. Remove the purge valve mounting bolt and remove the purge valve.
5. Installation is the reverse of removal.
EVAP canister
6. Raise the vehicle and place it securely on jack stands.
7. Remove the fuel tank (see Fuel and exhaust systems).
8. Disconnect the electrical connector (s) and hoses from the EVAP canister.
9. Disconnect the electrical connector from the leak detection pump module.
10. Remove the three EVAP canister mounting bolts to detach the canister. Before removing the canister, you’ll need to detach any other wiring harnesses clipped to the canister mounting bracket.
11. Installation is the reverse of removal.
Leak detection pump
12. Remove the EVAP canister (see Steps 6 through 10).
13. Disconnect the inlet hose and electrical connector.
14. Remove the pump mounting bolts and remove the leak detection pump.
15. Installation is the reverse of removal.