Powertrain Control Module (PCM) — removal and installation
Warning: The models covered by this manual are equipped with Supplemental Restraint Systems (SRS), more commonly known as airbags. Always disable the airbag system before working in the vicinity of any airbag system components to avoid the possibility of accidental deployment of the airbag, which could cause personal injury (see Chassis electrical system). Caution: To avoid electrostatic discharge damage to the ECM, handle the PCM only by its case. Do not touch the electrical terminals during removal and installation. If available, ground yourself to the vehicle with an anti-static ground strap, available at computer supply stores.
1. On four-cylinder models, the Powertrain Control Module (PECM) is located in the engine compartment next to the driver’s side inner fender panel. On August, 2011 and earlier-manufactured models it’s located on the firewall in the engine compartment, on the right (passenger’s) side. On September 2011 and later-manufactured models, it’s located at the left (driver’s) side of the engine compartment, next to the battery.
2. Disconnect the cable from the negative battery terminal (see Engine electrical systems).
Four-cylinder models
3. Remove the engine cover (see Four-cylinder engines).
4. Remove the air filter housing (see Fuel and exhaust systems).
5. Remove the air filter housing bracket mounting bolts and bracket.
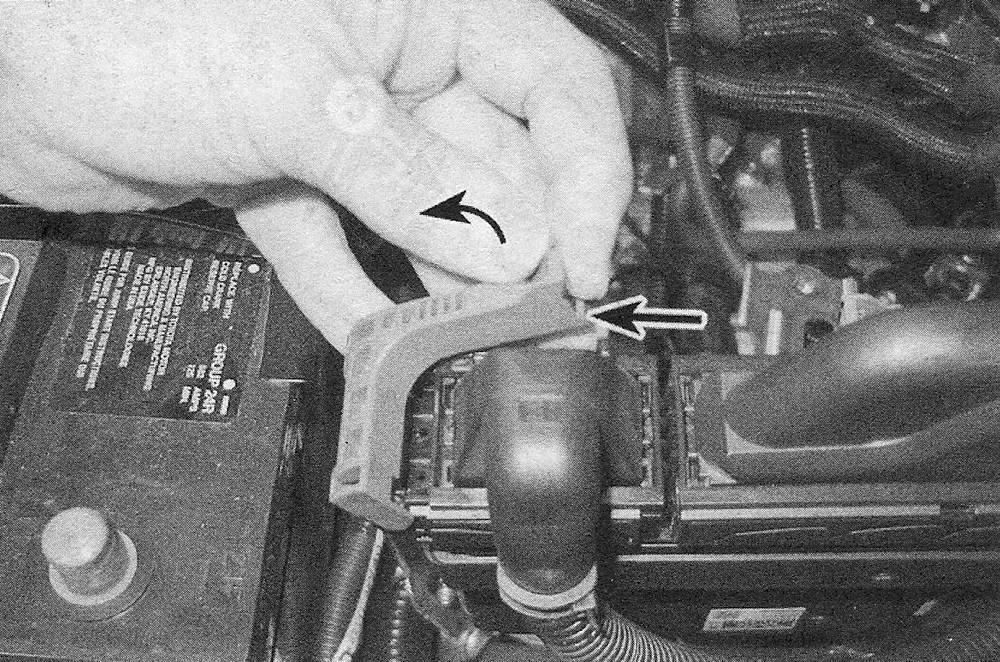
6. To release the PCM connectors, push in the lever locks (at the end of each lever), while lifting the levers outwards, and pull the PCM connectors out from the PCM (see illustration). Caution: The ignition switch must be turned OFF when pulling out or plugging in the electrical connectors to prevent damage to the PCM.
15.6 To release the ECM connectors, rotate the levers outwards and pull the ECM connectors out of the ECM
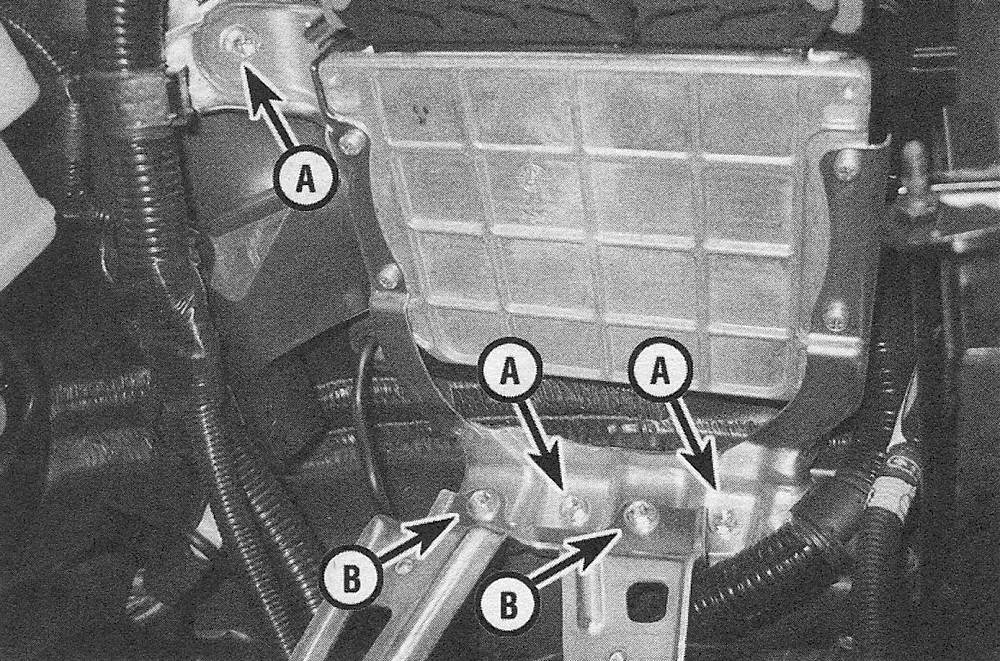
7. Remove the air filter housing bracket fasteners, then the PCM bracket-to-body fasteners (see illustration).
15.7 ECM mounting details — four-cylinder models and pull the ECM connectors out of the ECM
A ECM bracket mounting fasteners
B Air filter housing bracket fasteners
8. Carefully remove the ECM and bracket.
Caution: Avoid any static electricity damage to the computer by grounding yourself to the body before touching the PCM and using a special anti-static pad to store the PCM on once it is removed.
9. Remove the bracket-to-PCM mounting screws and separate the bracket from the PCM.
10. Installation is the reverse of removal.
V6 models
11. On August, 2011 and earlier-manufactured models, remove the cowl assembly (see Body). On September 2011 and later manufactured models, remove the battery (see Engine electrical systems).
12. To release the PCM connectors, push in the lever locks (at the end of each lever), while lifting the levers outwards, and pull the PCM connectors out from the PCM (see illustration 15.6).
Caution: The ignition switch must be turned OFF when pulling out or plugging in the electrical connectors to prevent damage to the PCM.
Caution: Avoid any static electricity damage to the computer by grounding yourself to the body before touching the PCM and using a special anti-static pad to store the PCM on once it is removed.
13. Remove the PCM bracket mounting fasteners and PCM as an assembly.
14. Remove the PCM bracket bolts and separate the brackets from the PCM.
15. Installation is the reverse of removal.
16. If a new (replacement) PCM is to be installed, the following system programming procedures need to be performed after installation (these must be performed at a dealership or other qualified repair facility).
- ) The VIN must be input
- ) Anti-theft security access and immobilizer system
- ) Initialization input procedure