Engine balancer assembly — removal and installation
2AR-FE engine (2010 and later models)
1. Position the engine at TDC compression for cylinder No. 1 (see Top Dead Center (TDC) for number one piston — locating). Disconnect the negative battery cable (see Engine electrical systems).
2. Remove the engine oil pan (see Oil pan — removal and installation), then remove the oil strainer mounting bolts and remove the strainer.
3. Remove the oil baffle plate mounting bolts and remove the baffle plate.
4. Remove the balancer assembly mounting bolts and lift the assembly off.
5. Before installing the balancer assembly, check that the alignment line mark of the ball- acne shaft damper cover and dot on the ball-
6. If the alignment marks are not aligned, place a wrench on the rear cutout of the No. 2 balance shaft and hold the assembly.
7. Rotate the balance shaft gear of the No. 1 balance shaft counterclockwise to align the alignment dot of the balance shaft gear with the alignment mark line of the balance shaft damper cover. Make sure the balance shafts stay in this position until the assembly is installed.
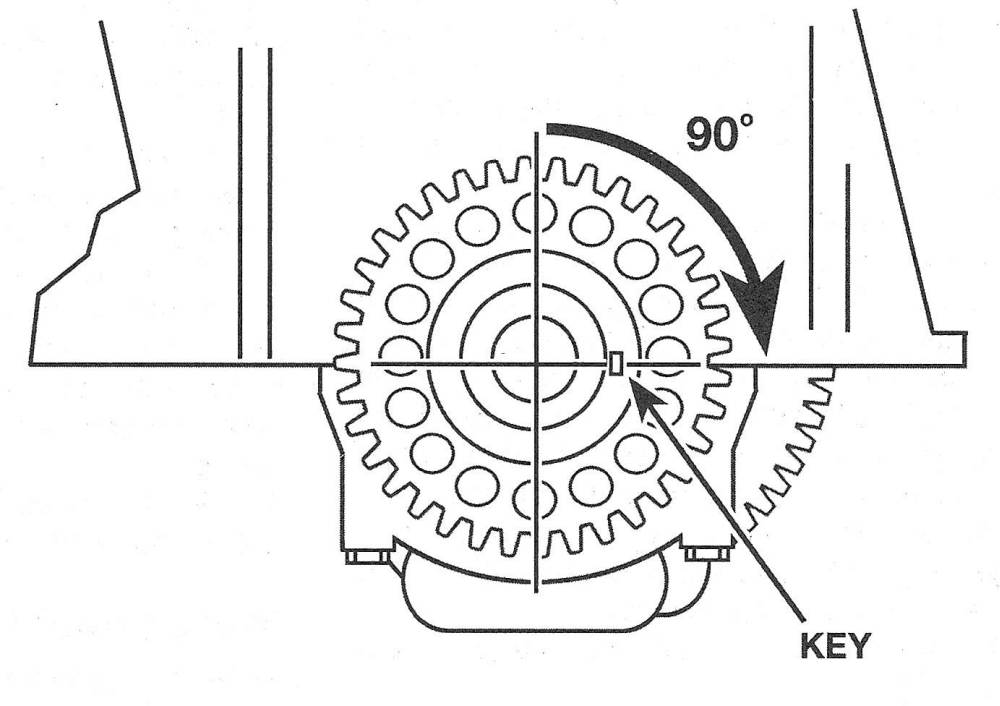
8. Turn the crankshaft 90-degrees clock- wise so the keyway is aligned with the bottom of the cylinder block (see illustration).
18.8 Before installing the engine balancer, turn the crankshaft 90 – degrees clockwise from its TDS position…
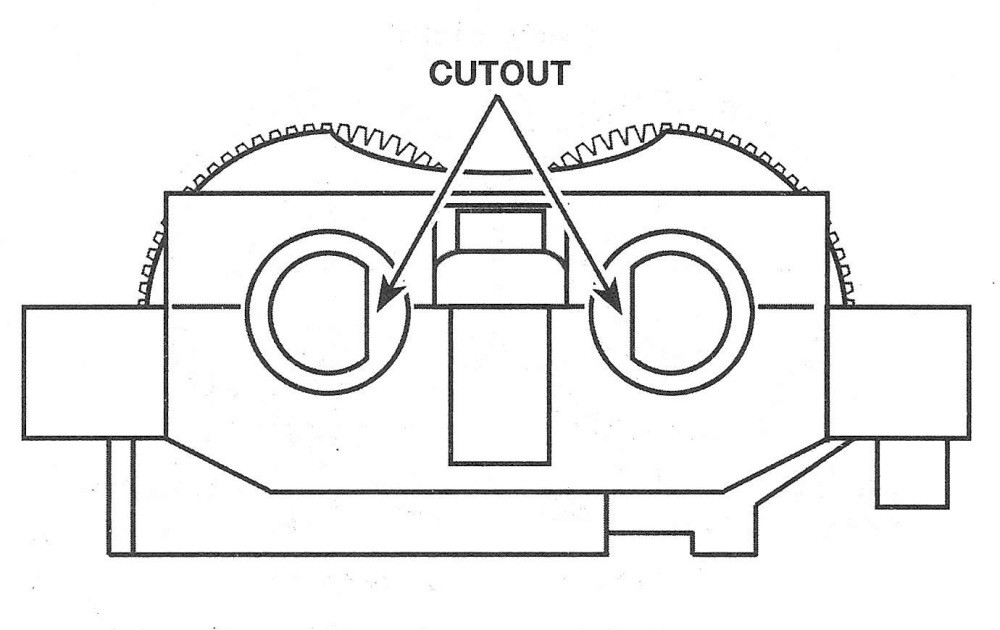
9. Check to make sure the cutouts at the rear ends of the shafts are facing each other (see illustration).
18.9. . and make sure the cutouts at the rear ends of the balancer shafts are facing each other like this
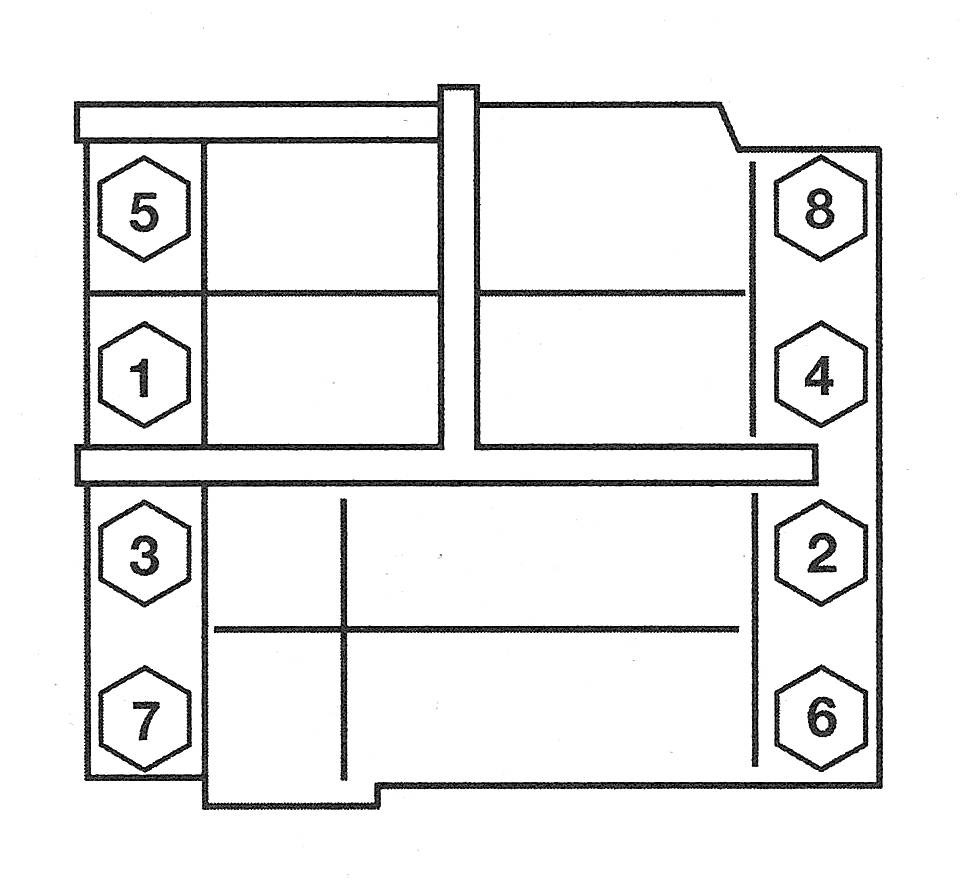
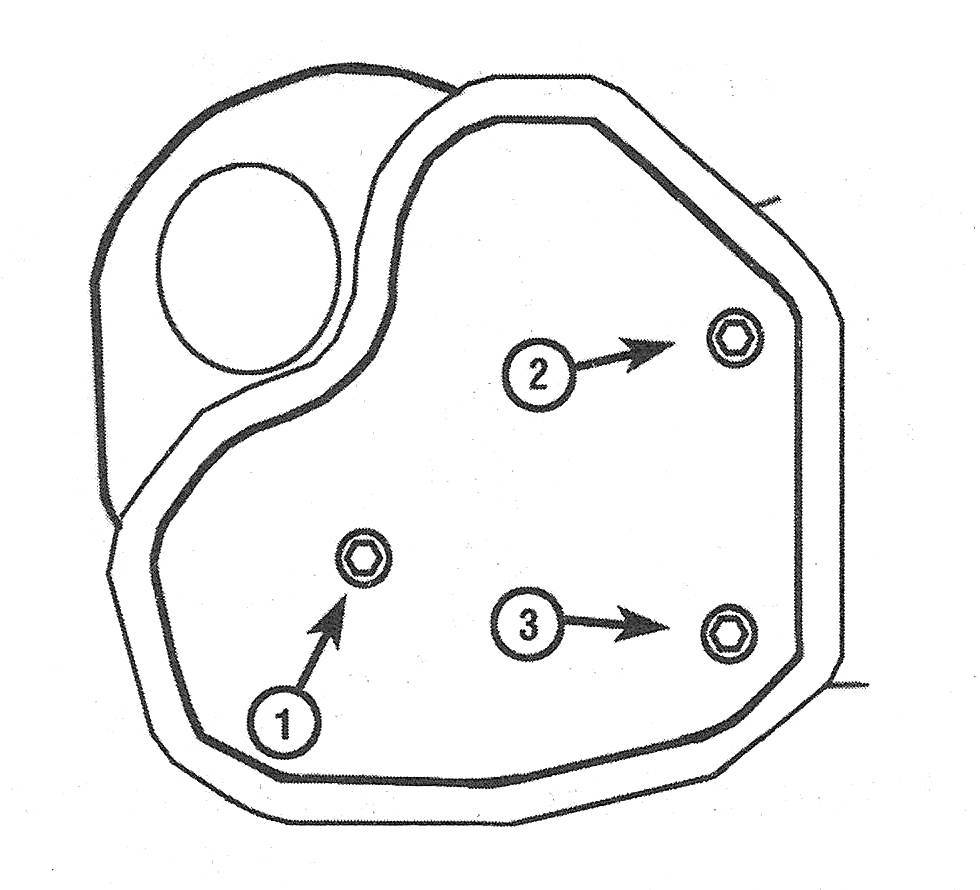
10. Install the engine balancer and tighten the bolts in the proper sequence (see illustration) to the torque listed in this Chapter’s Specifications.
18.10 Engine balancer assembly bolt TIGHTENING sequence — 2010 and later models
2AZ-FE engine
(2009 and earlier models)
Note: It is recommended to remove the engine to perform this procedure. Additionally, it is important to note that in the following procedure, the orientation of the components and timing marks are shown with the engine inverted (as if mounted on an engine stand).
11. Disconnect the negative battery cable (see Engine electrical systems).
12. Remove the oil pan and the oil pump (see Oil pan — removal and installation and Oil pump — removal and installation).
13. Remove the balance shaft housing bolts, in the order opposite that of the tightening sequence (see illustration 18.20).
14. Remove the balance shafts.
15. Remove the balance shaft bearing shells from the housing and the lower crankcase and install new ones. Lubricate the bearing faces with engine assembly lube.
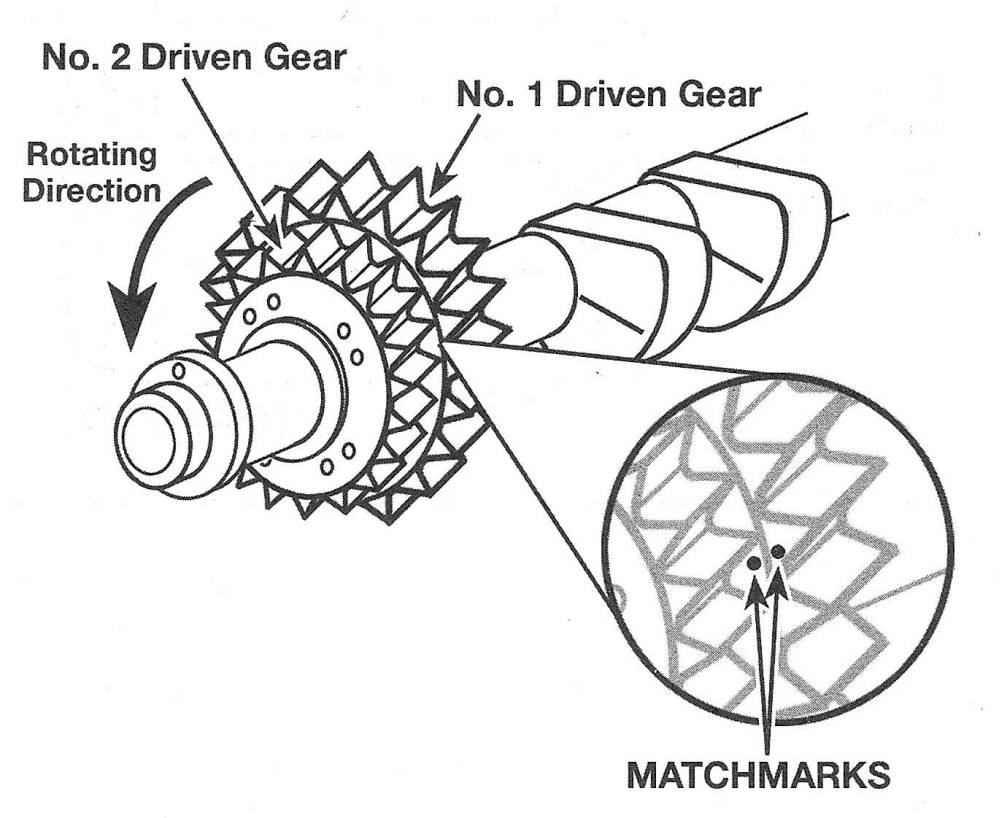
16. Turn the driven gear of balance shaft no. 1 counterclockwise until it hits its stop. Make sure the matchmarks on the no. 1 driven gear and the no. 2 driven gear are in alignment (see illustration).
18.16 Align the matchmarks of the driven gears on the No. 1 balance shaft
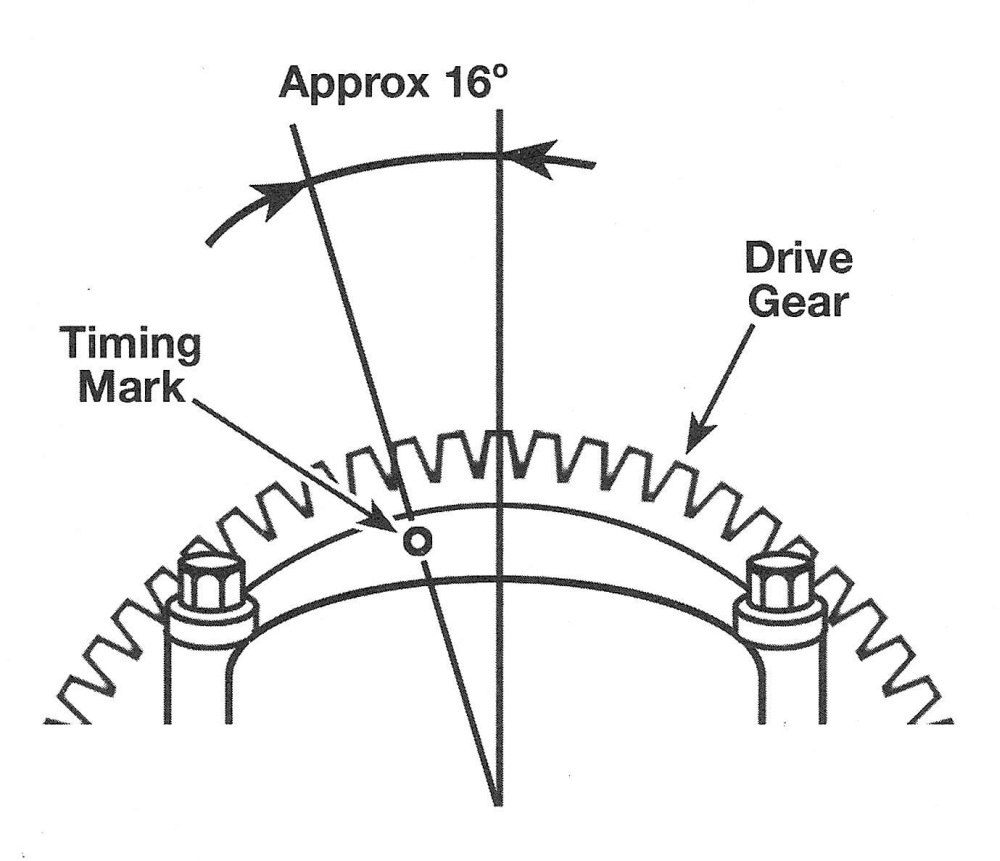
17. Turn the crankshaft so the balance shaft drive gear timing mark on the crankshaft must be approximately 16-degrees before the 12 o’clock position (see illustration)
18.17 The timing mark on the balance shaft drive gear must be approximately 16-degrees before the 12 o’clock position ( engine shown inverted)
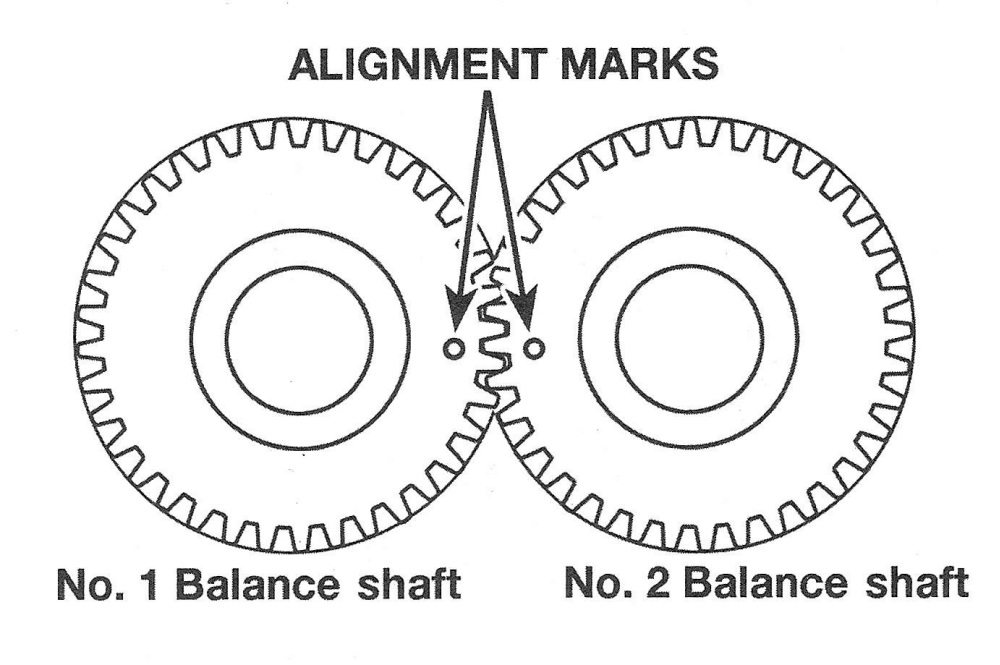
18. Mesh the gears of the balance shafts, aligning the matchmarks (see illustration).
18.18 Mesh the gears of the balance shafts with the marks in alignment
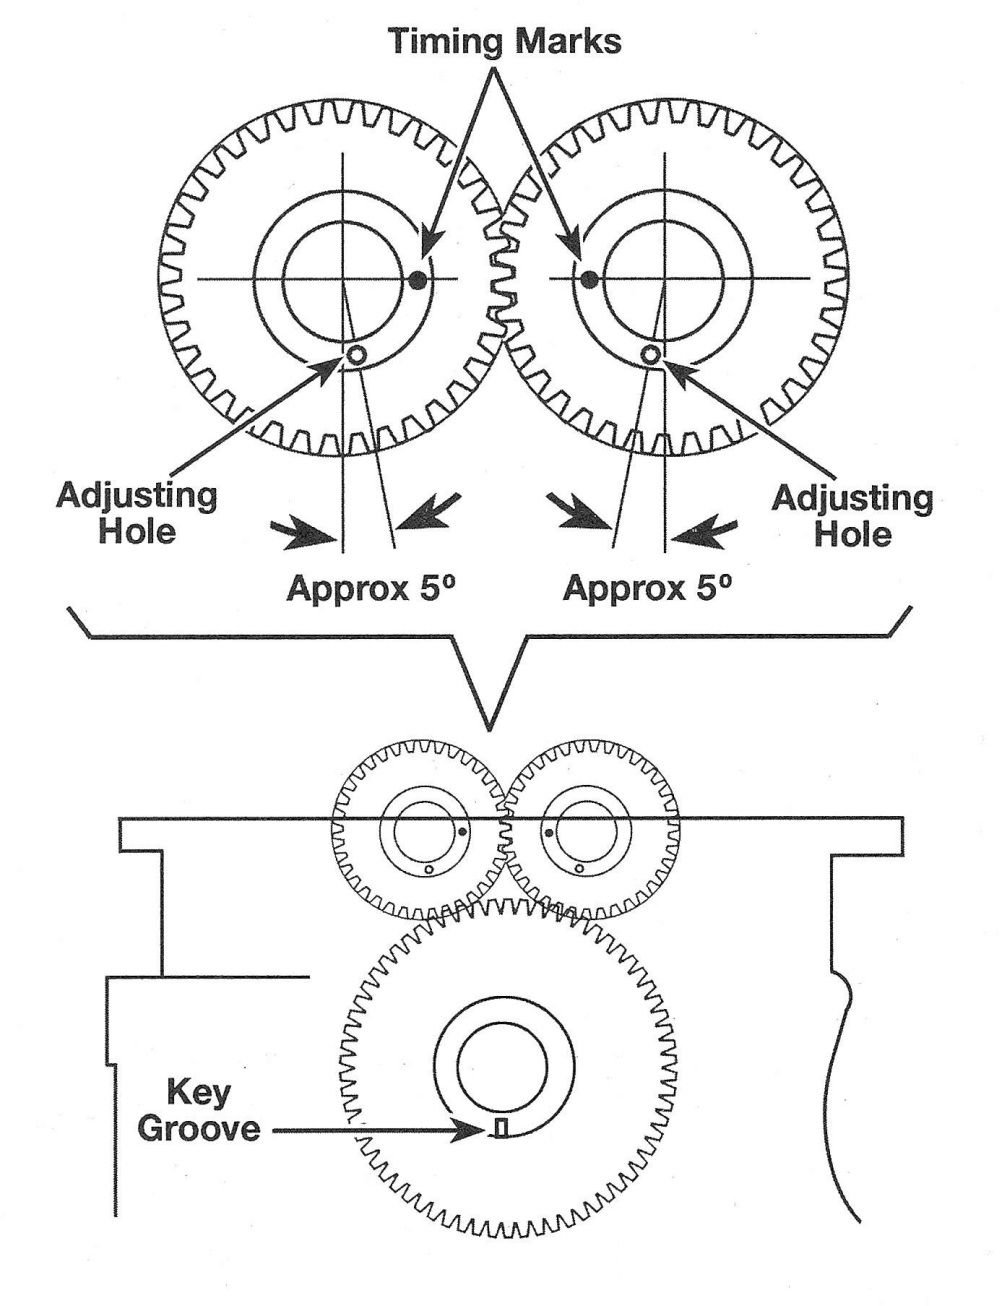
19. Install the balance shafts in the crankcase with the timing marks and adjusting holes aligned as shown (see illustration).
18.19 When installed, the balance shaft markings and the key groove in the nose of the crankshaft must be positioned like
20. Install the balance shaft housing and tighten the bolts, in sequence (see illustration), to the torque listed in this Chapter’s Specifications.
18.20 Balance shaft housing bolt tightening sequence