Exhaust manifold — removal and installation
Warning: The engine must be completely cool before beginning this procedure.
Removal
1. Disconnect the cable from the negative battery terminal (see Engine electrical systems).
2. Raise the front of the vehicle and sup- port it securely on jack stands. Working below the vehicle, remove the lower splash shields.
3. Apply penetrating oil to the bolts retaining the exhaust pipe to the manifold. After the bolts have soaked, remove the bolts retaining the exhaust pipe to the manifold (see illustration). Separate the front exhaust pipe from the manifold.
9.3 Working below the vehicle, remove the exhaust pipe-to-manifold mounting bolts (A) and lower the front exhaust pipe. Be careful not to damage the oxygen sensors (C) — (B) indicates the mounting fasteners for the
exhaust manifold lower brace
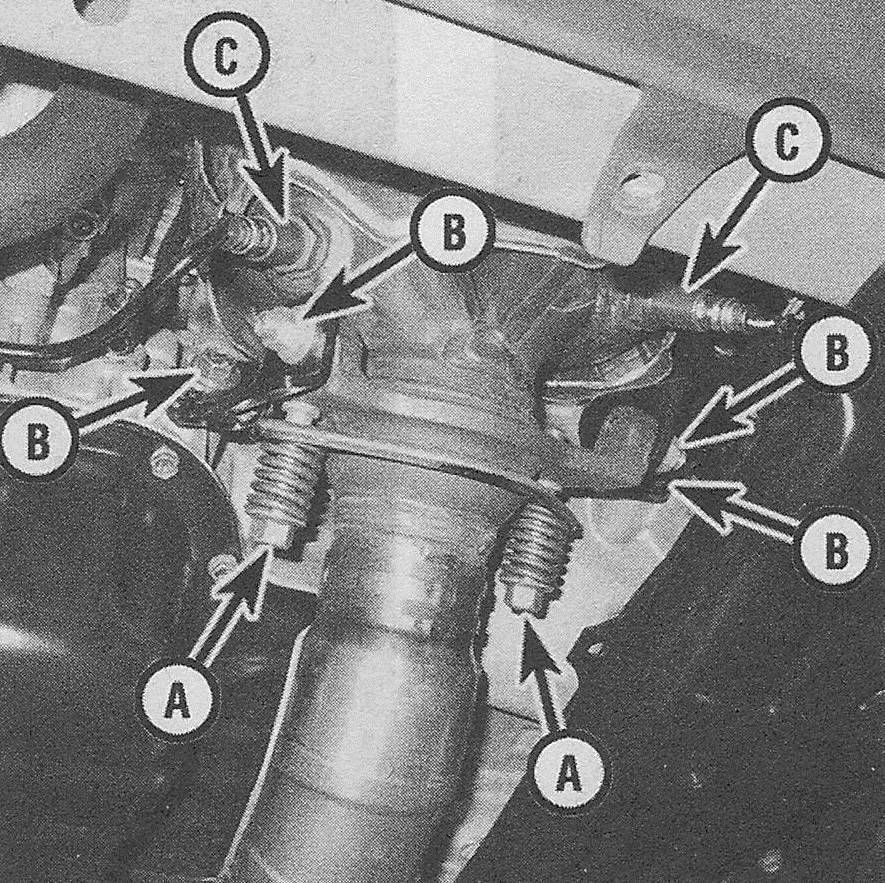
4. Unbolt the lower exhaust manifold braces and remove them from the engine. Also, disconnect the oxygen sensor connectors.
5. Working in the engine compartment, remove the upper heat shield from the manifold (see illustration).
9.5 Working from the engine compartment, remove the upper heat shield mounting bolts 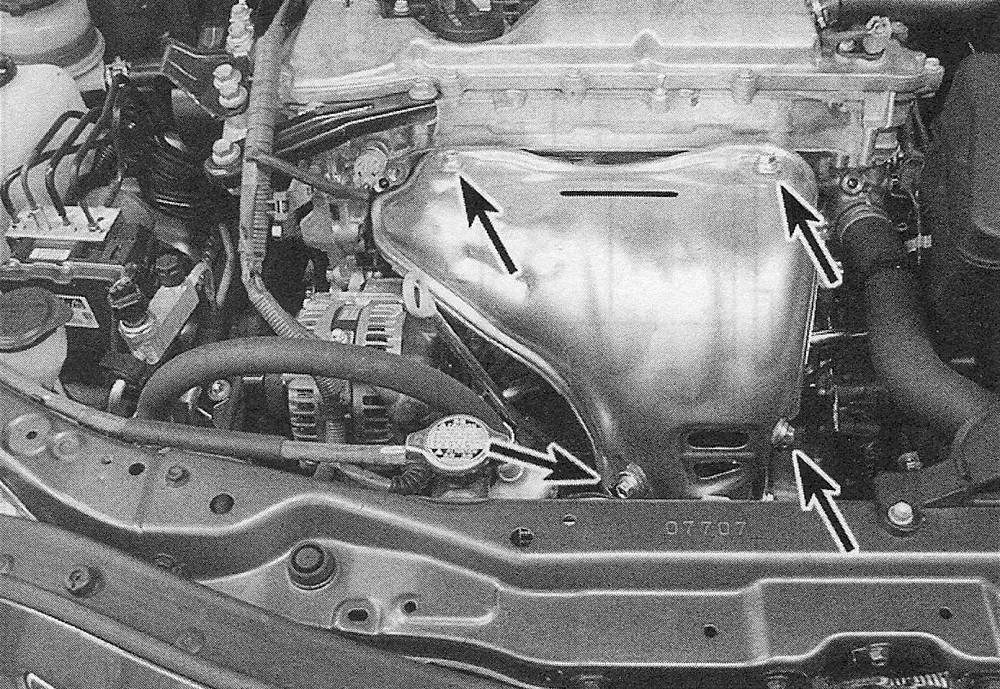
Note: There is also a lower heat shield, but it is attached to the manifold from underneath and does not need to be removed.
6. Remove the nuts/bolts and detach the manifold and gasket (see illustration).
9.6 … and the exhaust manifold retaining nuts, then pull the manifold off the studs on the cylinder head and remove from above

Installation
7. Use a scraper to remove all traces of old gasket material and carbon deposits from the manifold and cylinder head mating surfaces. If the gasket shows signs of leaking, check the manifold for warpage with a straight edge. If the manifold is warped, it must be replaced.
Note: If the manifold is being replaced with a new one, it will be necessary to remove the lower heat shield and fasten it to the new manifold.
8. Position a new gasket over the cylinder head studs, noting any directional marks or arrows on the gasket which may be present.
9. Install the manifold and thread the mounting nuts into place.
10. Working from the center out, tighten the nuts/bolts to the torque listed in this Chapter’s Specifications in three or four equal steps.
11. Reinstall the remaining parts in the reverse order of removal.
12. Run the engine and check for exhaust leaks.