Oil pan — removal and installation
Removal
1. Disconnect the cable from the negative battery terminal (see Engine electrical systems).
2. Set the parking brake and block the rear wheels.
3. Raise the front of the vehicle and sup- port it securely on jack stands.
4. Remove the two plastic splash shields under the engine, if equipped.
5. Drain the engine oil and remove the oil filter (see Tune-up and routine maintenance). Remove the oil dipstick.
6. Remove the bolts and detach the oil pan.
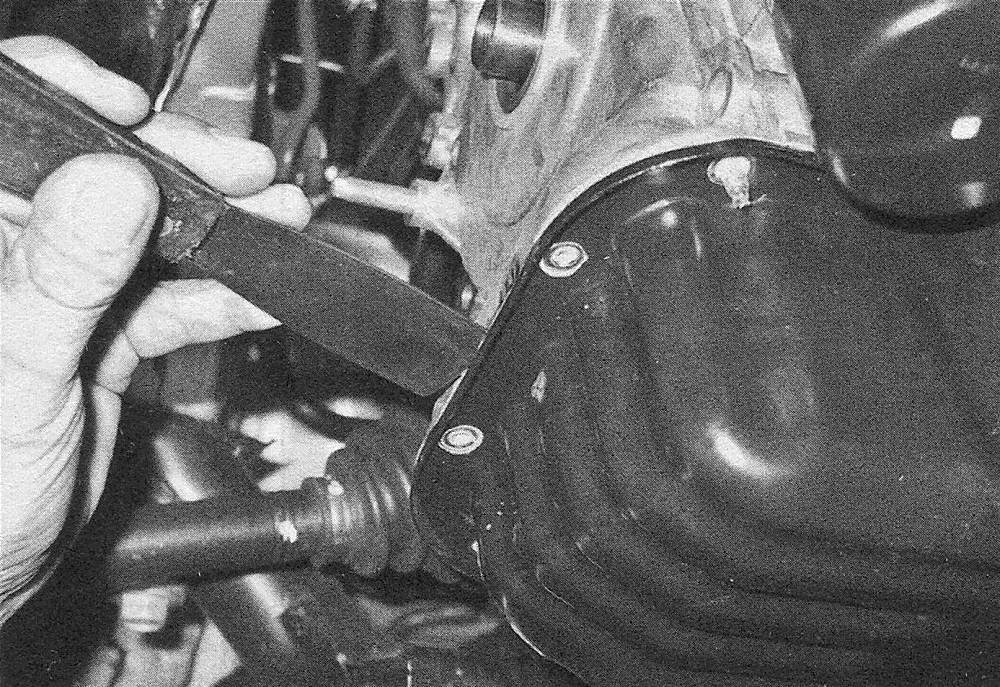
If it’s stuck, pry it loose very carefully with a small screwdriver or putty knife (see illustrations). Don’t damage the mating surfaces of the pan and block or oil leaks could develop.
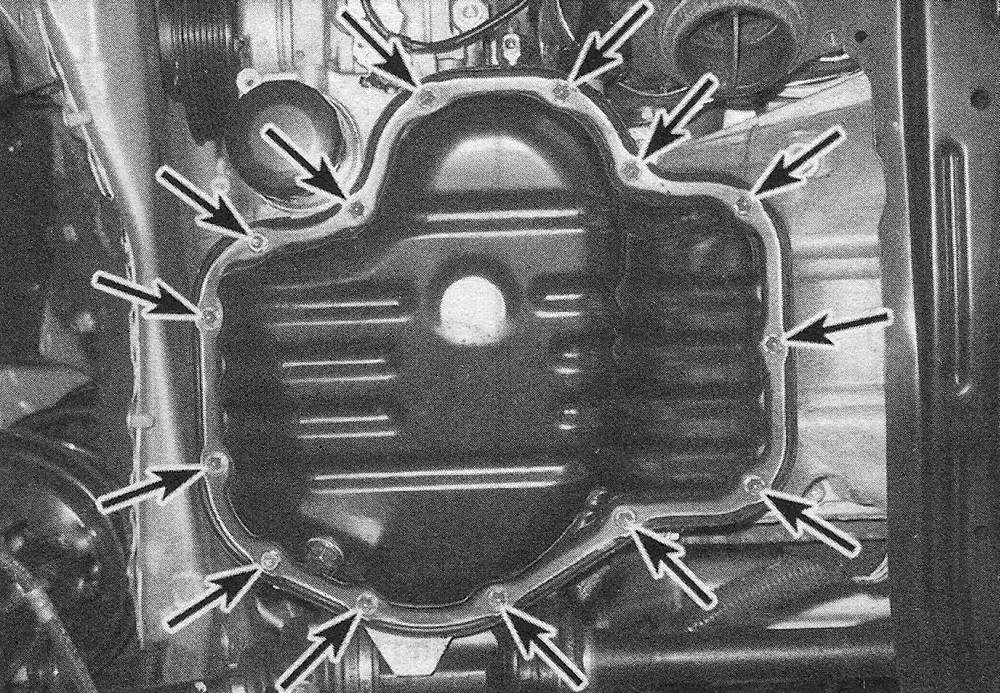
13.6a Oil pan mounting bolts
13.6b Pry the oil pan loose with a screwdriver or putty knife — be careful not to damage the mating surfaces of the pan and block or oil leaks may develop
Installation
7. Use a scraper to remove all traces of old sealant from the block and oil pan. Clean the mating surfaces with brake system cleaner.
8. Make sure the threaded bolt holes in the block are clean.
9. Check the oil pan flange for distortion, particularly around the bolt holes. Remove any nicks or burrs as necessary.
10. Inspect the oil pump pick-up tube assembly for cracks and a blocked strainer. If the pick-up was removed, clean it thoroughly and install it now, using a new gasket. Tighten the nuts/bolts to the torque listed in this Chapter’s Specifications.
11. Apply a 3/16-inch-wide bead of RTV sealant to the mating surface of the oil pan. Note: Be sure follow the sealant manufacturers recommendations for assembly and sealant curing times.
12. Carefully position the oil pan on the engine block and install the oil pan-to-engine block bolts loosely.
13. Working from the center out, tighten the oil pan-to-engine block bolts to the torque listed in this Chapter’s Specifications in three or four steps.
14. The remainder of installation is the reverse of removal. Be sure to wait at least one hour before adding oil to allow the sealant to properly cure.
15. Run the engine and check for oil pressure and leaks.