Valve cover — removal and installation
Removal
1. Disconnect the cable from the negative battery terminal (see Engine electrical systems).
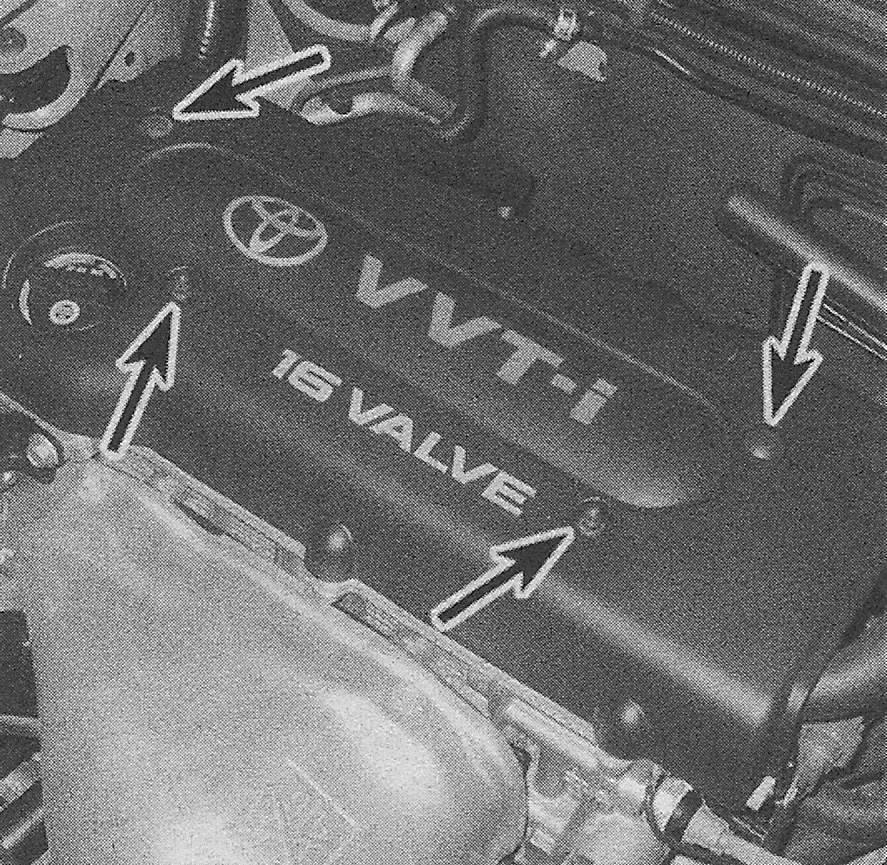
2. On 2009 and earlier models, remove the engine cover mounting fasteners and remove the cover (see illustration). On 2010 and later models, lift the cover up from the back off of the ball studs, then from the front, and remove the cover (see illustration).
4.2a Engine cover mounting nuts and retainers — 2009 and earlier models
4.2b Lift the cover up from the rear, off the ball studs, then detach the front, and remove the cover — 2010 and later models

3. Disconnect the electrical connectors from the ignition coils, remove the nuts securing the wiring harness to the valve cover and position the ignition coil wiring harness aside. Then remove the ignition coil pack from each of the spark plugs (see Engine electrical systems).
4. Detach the breather hoses from the valve cover.
5. On 2010 and later models, disconnect the camshaft timing control valve assemblies and camshaft position sensor electrical connectors. Remove the mounting bolts for the control valves and sensors (see Emissions and engine control systems).
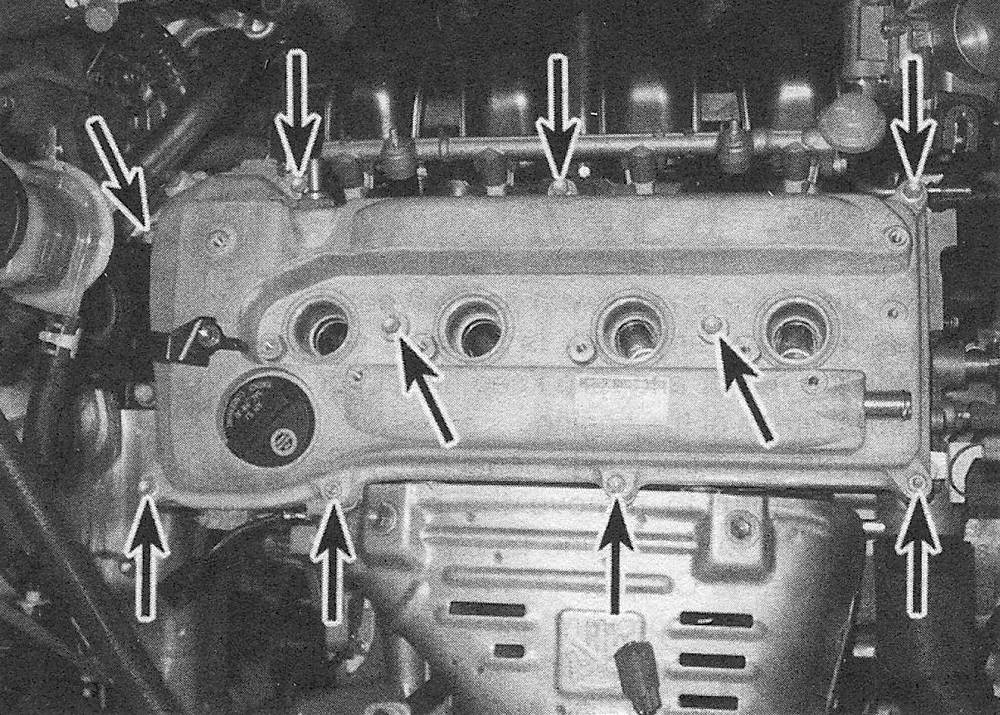
6. Remove the valve cover mounting fasteners, then detach the valve cover and gasket from the cylinder head (see illustration). If the valve cover is stuck to the cylinder head, bump the end with a wood block and a hammer to jar it loose. If that doesn’t work, try to slip a flexible putty knife between the cylinder head and valve cover to break the seal.
4.6 Valve cover fastener locations (2009 and earlier model shown, 2010 and later models similar)
Caution: Don’t pry at the valve cover-to-cylinder head joint or damage to the sealing surfaces may occur, leading to oil leaks after the valve cover is reinstalled.
Installation
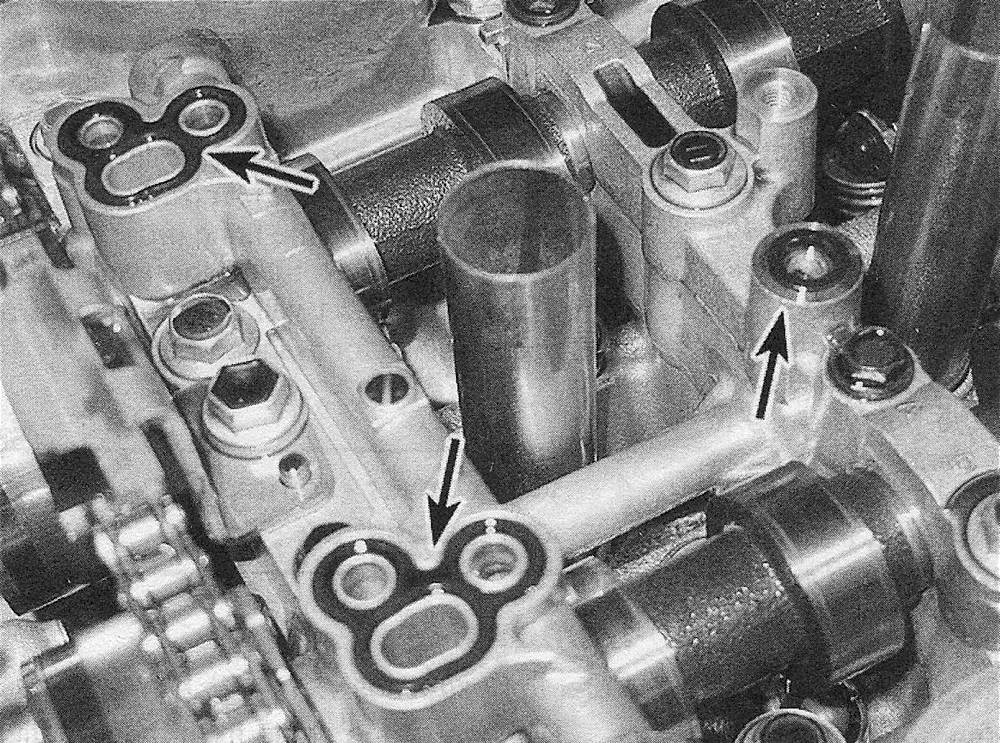
7. Remove the valve cover gasket from the valve cover and clean the mating surfaces with brake system cleaner. On 2010 and later models, remove the 0-rings from the cylinder head (see illustration). Install a new rubber gasket (and 0-rings on 2010 and later models), pressing it evenly into the grooves around the underside of the valve cover.
4.7a Replace the 0-ring gaskets in the cylinder head
4.7b the valve cover gasket and the spark plug tube seals are incorporated into a single rubber 0-ring-like seal. Press the gasket evenly into the grooves around the underside of the valve cover and the spark plug openings (2009 and earlier models)

Note: Make sure the spark plug tube seals are in place on the underside of the valve cover before reinstalling it (see illustration). The mating surfaces of the timing chain cover, the cylinder head and valve cover must be perfectly clean when the valve cover is installed. If there’s residue or oil on the mating surfaces when the valve cover is installed, oil leaks may develop.
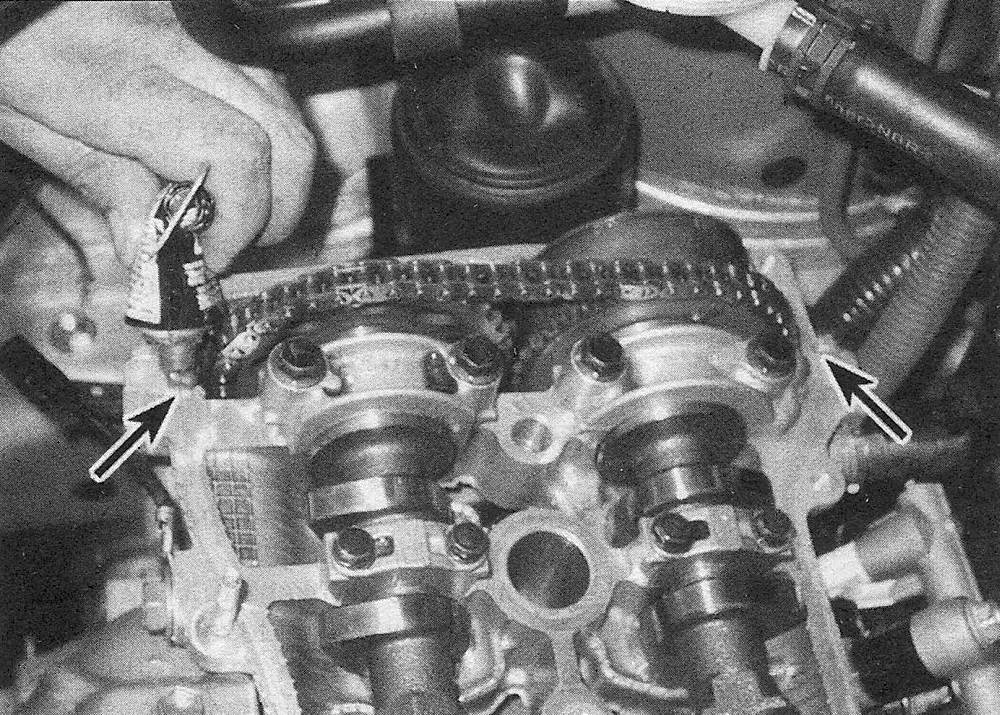
8. Apply RTV sealant at the timing chain cover-to-cylinder head joint, then install the valve cover and fasteners (see illustration).
4.8 Apply sealant at the timing chain cover-to-cylinder head joint before installing the valve cover
9. Tighten the nuts/bolts to the torque listed in this Chapter’s Specifications in three or four equal steps.
10. Reinstall the remaining parts, run the engine and check for oil leaks