Fuel pump module/fuel level sending unit — removal, component replacement and installation
Warning: Gasoline is extremely flammable, so take extra precautions when you work on any part of the fuel system.
Note: If a problem such as seized pump or otherwise damaged fuel pump occurred on a 2012 and later Caty or 2013 and later Avalon/Lexus ES350, excessive power may be continuously supplied to the fuel pump ECU, damaging its internal parts. If the pump was damaged or seized, replace the fuel pump ECU at the same time as replacing the fuel pump (see Starter motor — removal and installation).
Removal
1. Relieve the fuel system pressure (see Fuel pressure relief procedure).
2. Disconnect the cable from the negative terminal of the battery (see Engine electrical systems).
3. Remove the rear seat cushion (see Body).
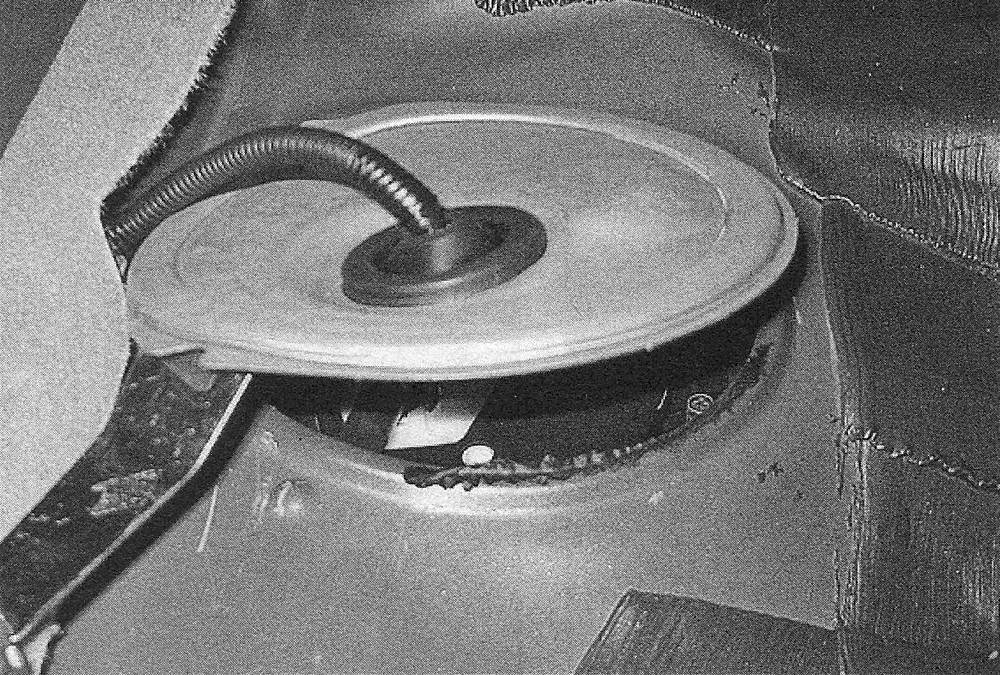
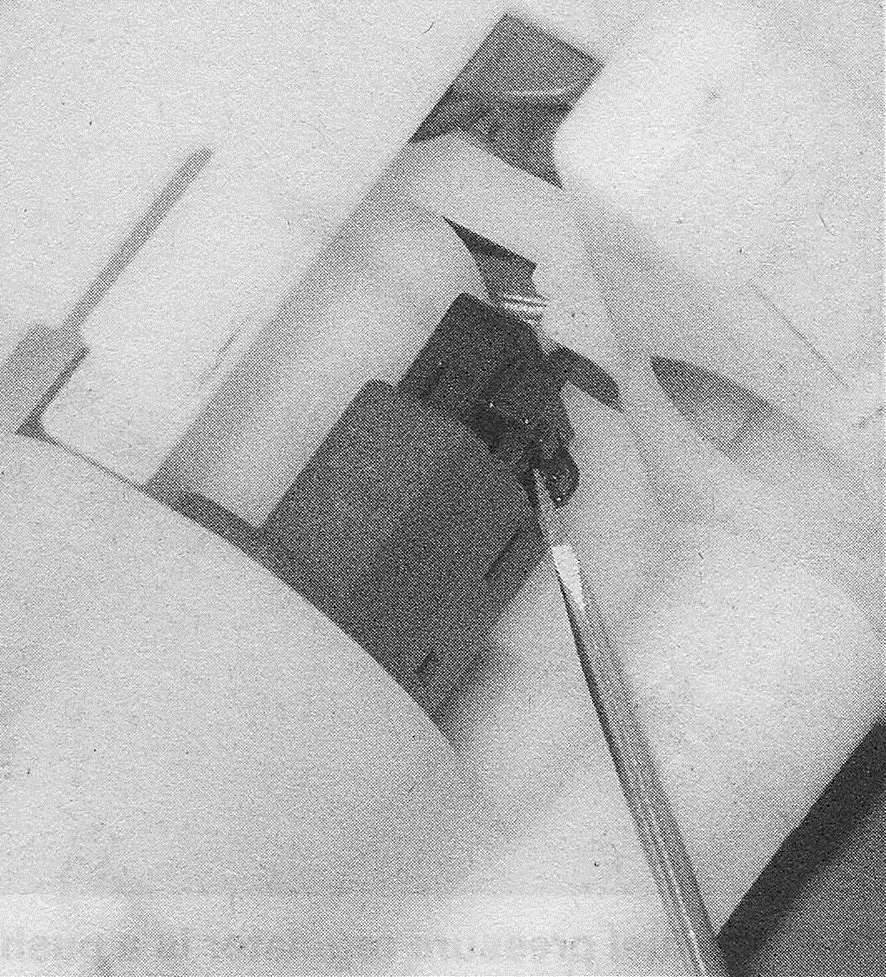
4. Carefully pry up the fuel pump module/ fuel level sending unit access cover (see illustration).
7.4 Pry the fuel access cover up — the adhesive is very sticky and will stain the carpet or seats
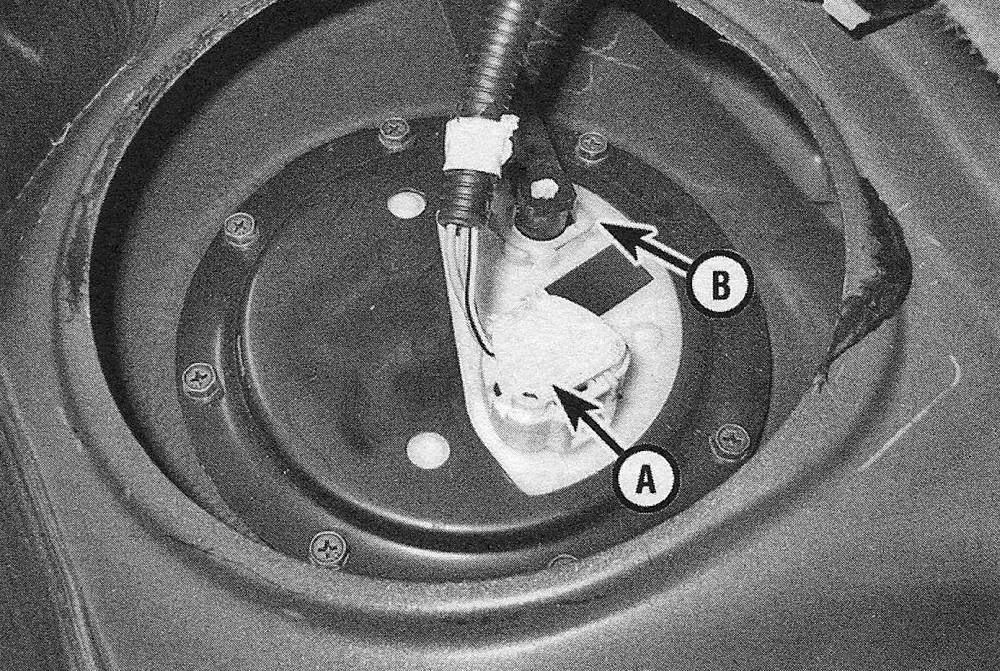
5. Disconnect the electrical connector (s) and the fuel line from the top of the fuel pump unit (see illustration). Using a small screwdriver, pull the yellow clip back to release the fuel line.
7.5 Disconnect the electrical connector (A), then pull the fuel line retaining clip (B) back and remove the fuel hose
6. Remove the fuel pump module/fuel level sending unit retaining bolts.
7. Carefully withdraw the fuel pump mod- ule/fuel level sending unit assembly from the fuel tank.
8. The components of the fuel pump assembly are modular and all attach to the main housing.
Fuel level sending unit
9. Disconnect the fuel sender electrical connector (see Illustration 7.14b).
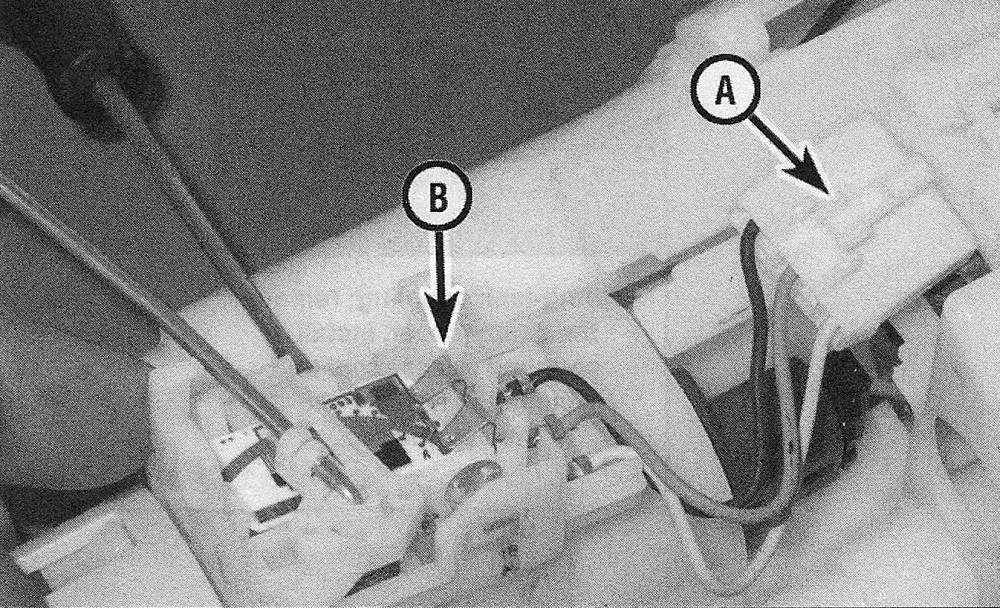
10. Depress the fuel sender plastic locking tab (see illustration) and slide it out to remove the unit.
7.10 Disconnect the electrical connector (A) and pry the fuel level sending unit from the clips (B)
11. Installation is the reverse of removal.
Fuel pump module
12. Remove fuel pump module/fuel level sending unit from the tank as described.
13. Remove the fuel level sending unit as previously described.
Four-cylinder models (2011 and earlier models)
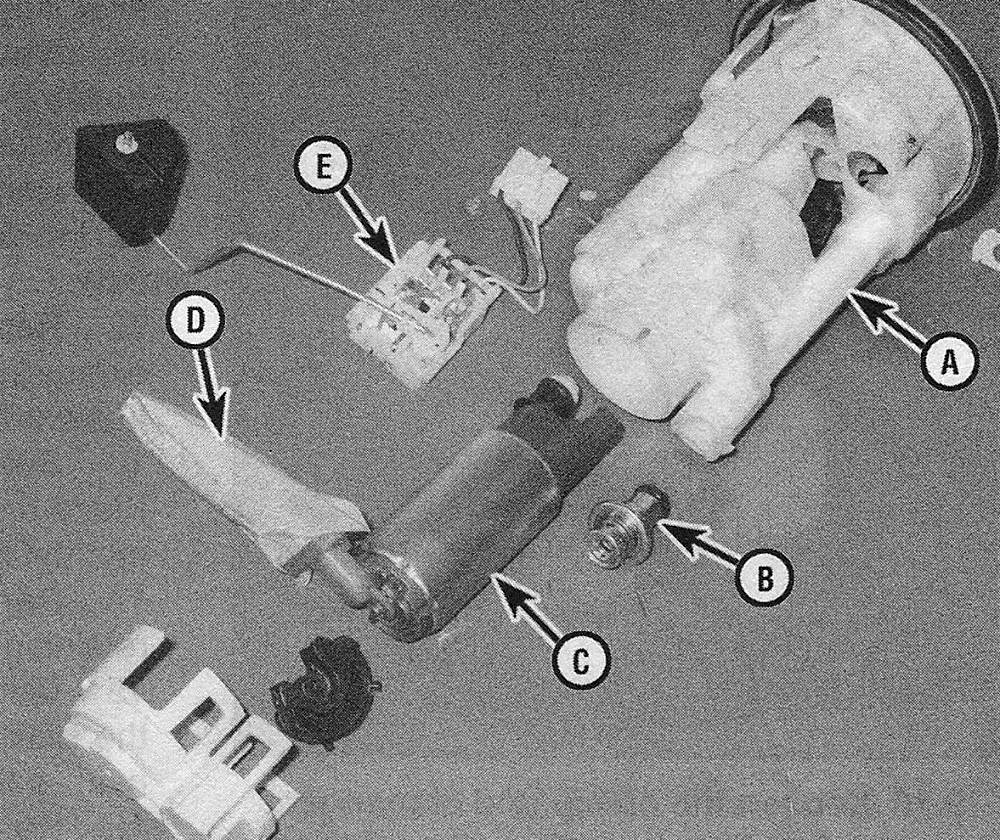
14. Disconnect the fuel pump electrical connector from the fuel suction plate (see illustrations).
7.14a Exploded view of the fuel pump/fuel level sending unit module — four-cylinder models
A Fuel filters
B Fuel pressure regulator
C Fuel pump
D Strainer
E Fuel level sending unit
7.14b Release the electrical connector at the top of the fuel pump assembly
15. Using needle-nose pliers remove the spring E-clip, then disengage the suction support mounting clips and separate the band bracket from the fuel filter assembly.
Cau tion: Do not try to disconnect the fuel tube fine between the fuel suction plate and the top plate. The tube and suction plate will be damaged.
16. Remove the spring from the fuel suction plate.
17. Using a screwdriver, disengage the clips from the fuel suction support and separate the support from the fuel pump.
18. Pull the fuel pump out from the filter assembly.
19. Disconnect and remove the fuel pump electrical harness.
20. Disengage the clips securing the inlet strainer to the pump (see illustration).
7.20 Carefully use a screwdriver to remove the clip securing the fuel sock filter to the pump
21. Remove the strainer and inspect it for contamination. If it is dirty, replace it.
V6 models, and 2012 and later 4-cylinder models
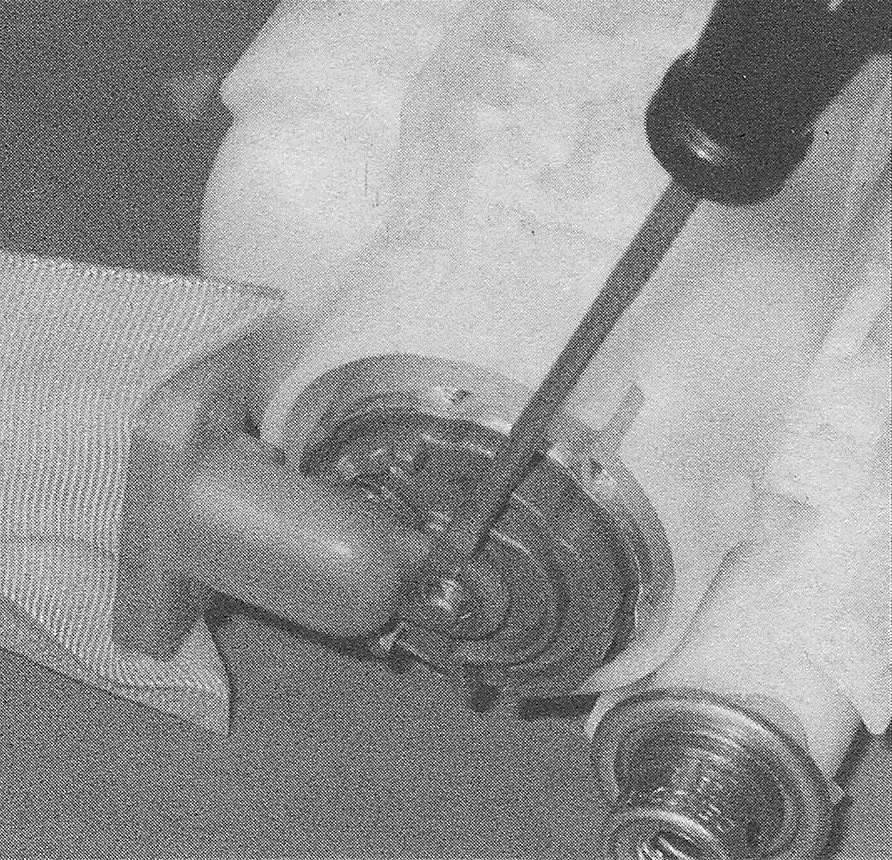
22. Using a screwdriver, pry the sub-tank from the base of the assembly (see illustration).
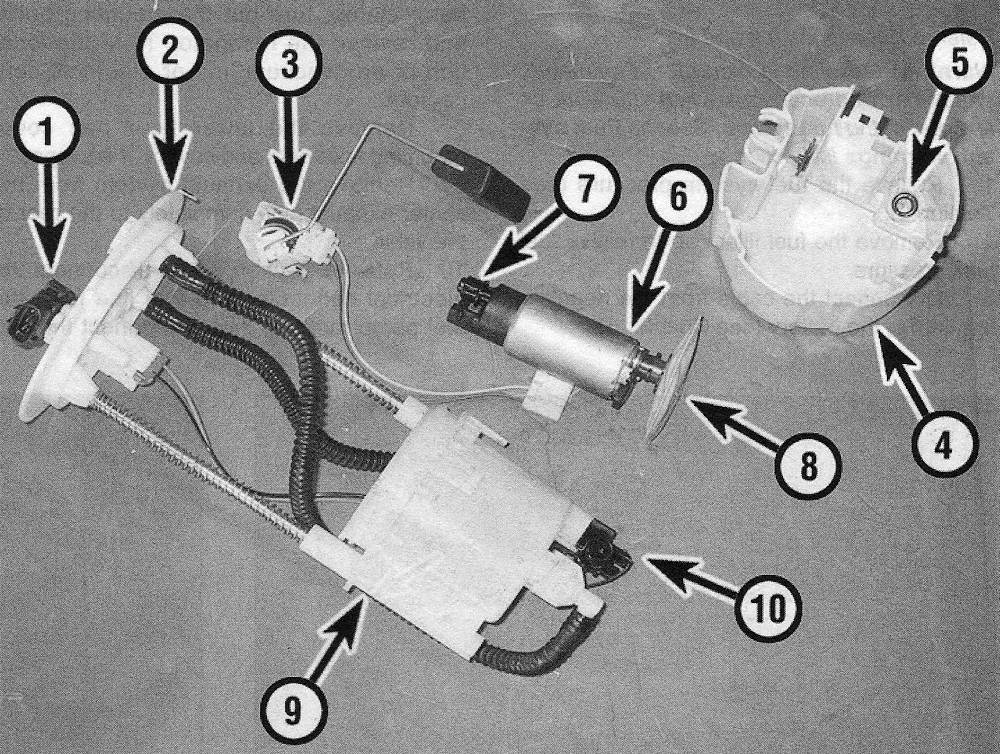
7.22 Exploded view of t he fuel pump/fuel level sending unit module — V6 models
1. Main harness connector
2. Mounting flange
3. Fuel level sending unit
4. Fuel pump sub-tank
5. O-ring (always replace)
6. Fuel pump
7. Fuel pump spacer
8. Strainer (fuel pump inlet filter)
9. Fuel filter assembly (sealed, cannot be replaced separately from the housing)
10. Fuel pressure regulator
23. Remove the rubber cushion from the bottom of the fuel pump. Note: At the time of writing, the fuel strainer is permanently attached to the fuel pump.
24. Disconnect the fuel pump electrical connector and disengage the fuel suction plate mounting clips.
25. Disconnect and remove the fuel pump electrical harness.
26. Pull the fuel pump up and out from the filter assembly.
27. Remove the clip securing the inlet strainer to the pump.
28. Remove the strainer and inspect it for contamination. If it is dirty, replace it.
Installation
29. Reassemble the fuel pump module in the reverse order of disassembly.
30. Install the fuel pump/sending unit assembly in the fuel tank electrical connector. If equipped with a quick-connect fitting, see Fuel lines and fittings — general information.
31. The remainder of installation is the reverse of removal.