Automatic transaxle fluid change
1. At the specified time intervals, the automatic transaxle fluid should be drained and replaced. Note: Although the manufacturer doesn’t specify it, it is a good idea to clean the transaxle fluid strainer periodically to remove accumulated dirt and metal particles.
2. Before beginning work, purchase the specified transaxle fluid (see Recommended lubricants and fluids in this Chapter’s Specifications).
3. The fluid should be drained immediately after the vehicle has been driven. Hot fluid is more effective than cold fluid at removing built up sediment.
Warning: Fluid temperature can exceed 350-degrees F in a hot transaxle. Wear protective gloves.
4. Raise the vehicle and support it securely on jack stands.
5. Move the necessary equipment under the vehicle, being careful not to touch any of the hot exhaust components.
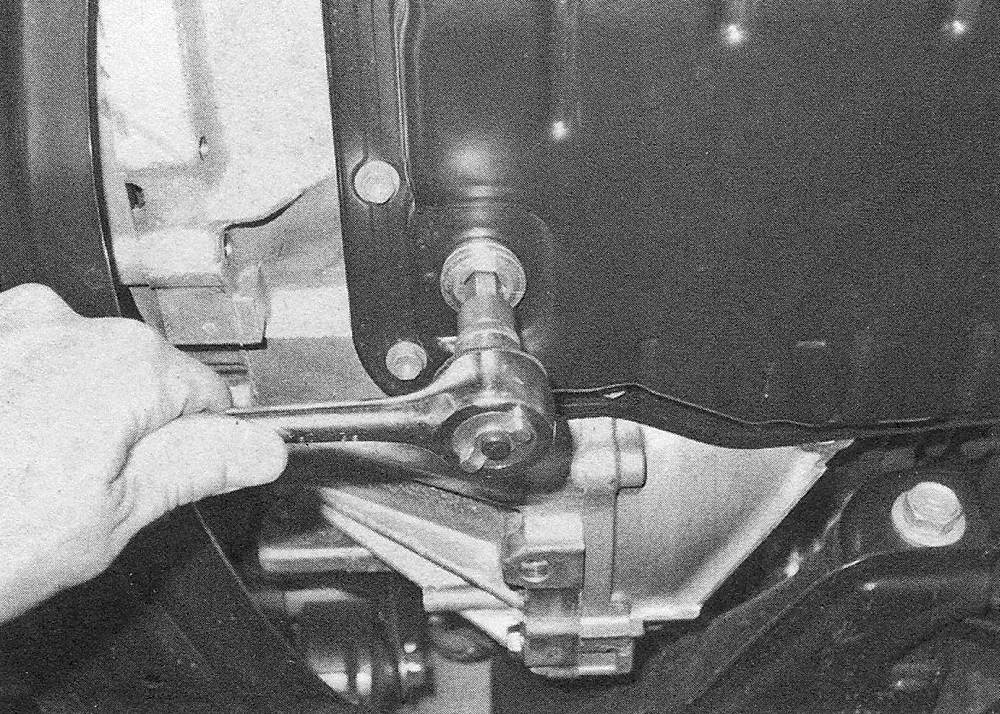
6. Place the drain pan under the drain plugs in the transaxle pan and remove the drain plug (see illustration). Be sure the drain pan is in position, as fluid will come out with some force. Once the fluid is drained, reinstall the drain plug securely. If you aren’t going to clean the strainer, proceed to Step 14.
25.6 Remove the automatic transaxle drain plug ( 2009 and earlier four-cylinder models)
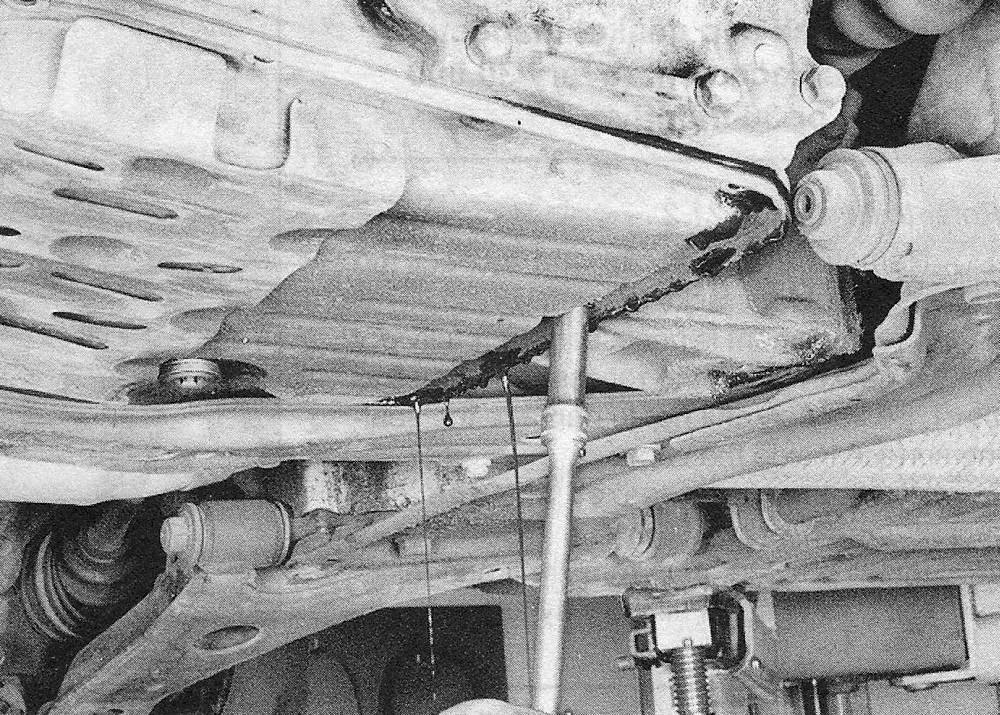
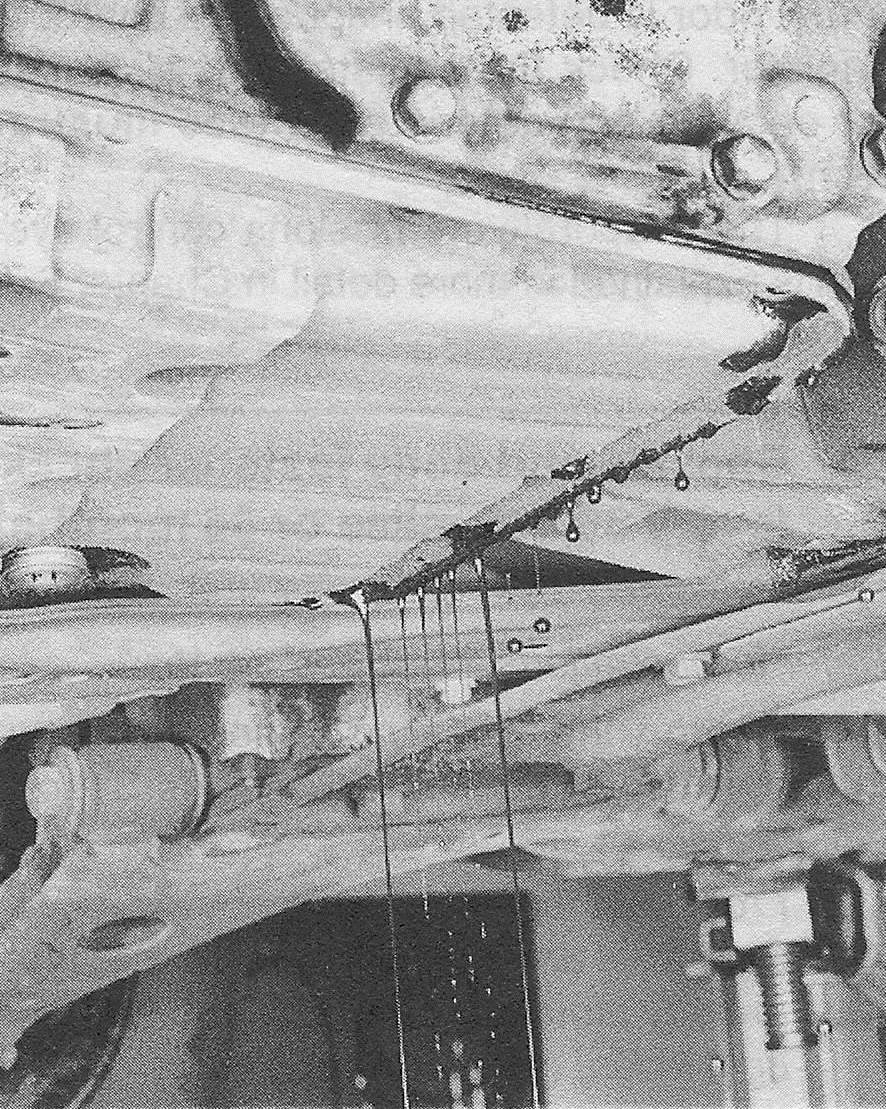
7. Remove the front transaxle pan bolts, then loosen the rear bolts and carefully pry the pan loose with a screwdriver and allow the remaining fluid to drain (see illustrations). Once the fluid had drained, remove the bolts and lower the pan. Warning: On models with the U660E or U760E transaxle (and no drain plug), the pan will be full of fluid.
25.7a After loosening the front bolts, remove the rear pan bolts …
25.7b … and allow the remaining fluid to drain out
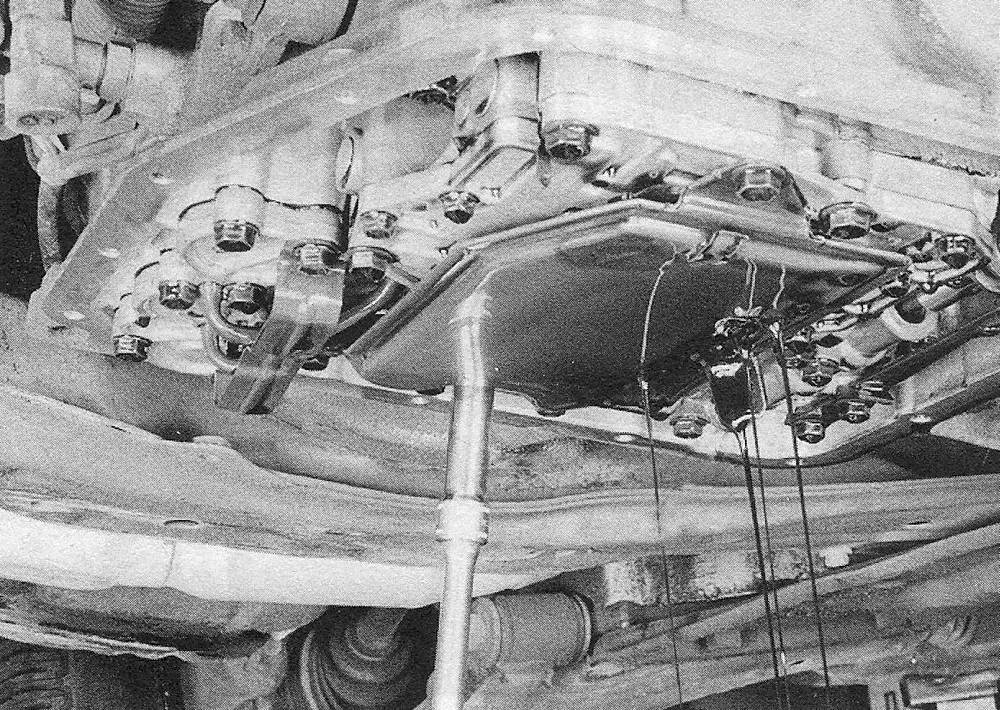
8. Remove the strainer retaining bolts, dis- connect the clip (some models) and lower the strainer from the transaxle (see illustration). Be careful when lowering the strainer as it contains residual fluid.
25.8 Remove the strainer bolts and lower the strainer ( be careful, there will be some residual fluid)
9. Clean the strainer thoroughly.
10. Place the strainer in position, connect the clip (if equipped) and install the bolts. Tighten the bolts to the torque listed in this Chapter’s Specifications.
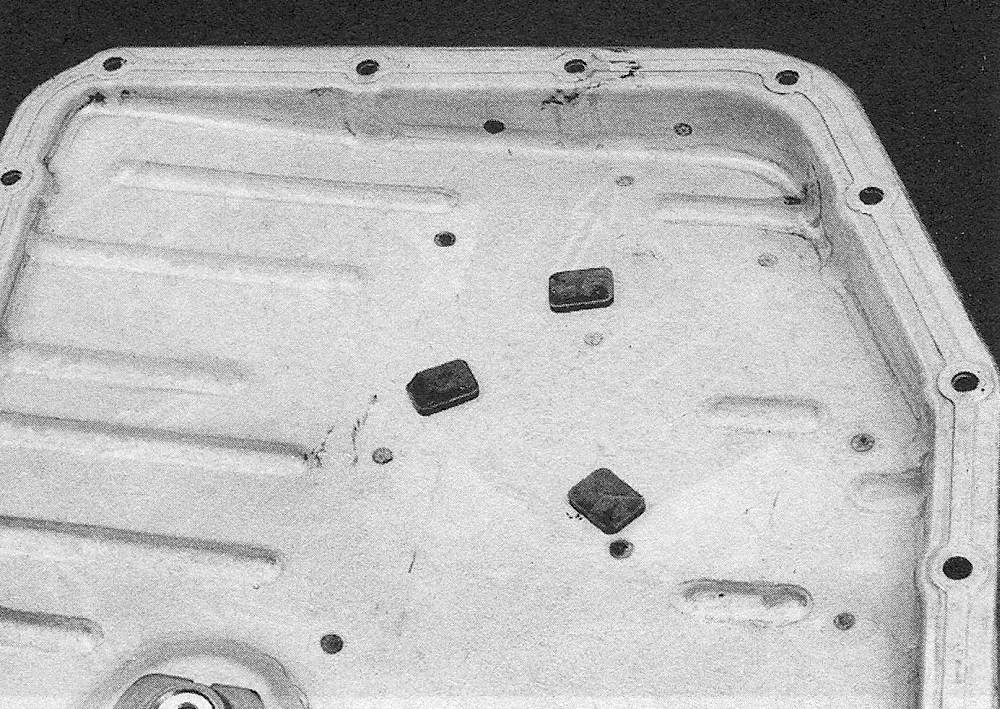
11. Carefully clean the gasket surfaces of the fluid pan, removing all traces of old gasket material. Remove the magnets, noting their locations. Wash the pan in clean solvent and dry it with compressed air.
Warning: Always wear eye protection when using compressed air! Be sure to clean and reinstall the magnets in the pan (see illus tration).
25.11 Noting their locations, remove the magnets and wash them and the pan in solvent before installing them
12. Install a new gasket, place the fluid pan in position and install the bolts in their original positions. Tighten the bolts to the torque listed in this Chapter’s Specifications.
2009 and earlier four-cylinder models
13. Lower the vehicle.
14. With the engine off, add new fluid to the transaxle through the dipstick tube (see this Chapter’s Specifications for the recommended fluid type and capacity). Use a funnel to prevent spills. It is best to add a little fluid at a time, continually checking the level with the dipstick (see Automatic transaxle fluid level check). Allow the fluid time to drain into the pan.
15. Start the engine and shift the shifter into all positions from P through L, then place the shifter into P and apply the parking brake.
16. With the engine idling, check the fluid level. Add fluid up to the Cool level on the dipstick.
All V6 models, 2010 and later four-cylinder models
17. Lower the vehicle.
18. Refer to Section Automatic transaxle fluid level check for the refilling procedure.
19. Check under the vehicle for leaks during the first few trips. Check the fluid level again when the transaxle is hot (see Automatic transaxle fluid level check).