Brake check
Warning: Dust created by the brake system is harmful to your health. Never blow it out with compressed air and don’t inhale any of it. An approved filtering mask should be worn when working on the brakes. Do not, under any circumstances, use petroleum-based solvents to clean brake parts. Use brake system cleaner only!
Note: For detailed photographs of the brake system, refer to Brakes.
1. In addition to the specified intervals, the brakes should be inspected every time the wheels are removed or whenever a defect is suspected. Any of the following symptoms could indicate a potential brake system defect: The vehicle pulls to one side when the brake pedal is depressed; the brakes make squealing or dragging noises when applied; brake travel is excessive; the pedal pulsates; brake fluid leaks, usually onto the inside of the tire or wheel.
2. The disc brake pads have built-in wear indicators which should make a high-pitched squealing or scraping noise when they are worn to the replacement point. When you hear this noise, replace the pads immediately or expensive damage to the discs can result.
3. Loosen the wheel nuts.
4. Raise the vehicle and place it securely on jack stands.
5. Remove the wheels (see Jacking and towing at the front of this book, or your owner’s manual, if necessary).
Disc brakes
6. There are two pads — an outer and an inner — in each caliper. The inner pad lining material is visible through inspection holes in each caliper (see illustration).
13.6 You’ll find an inspection hole like this in each caliper through which you can view the inner brake pad lining
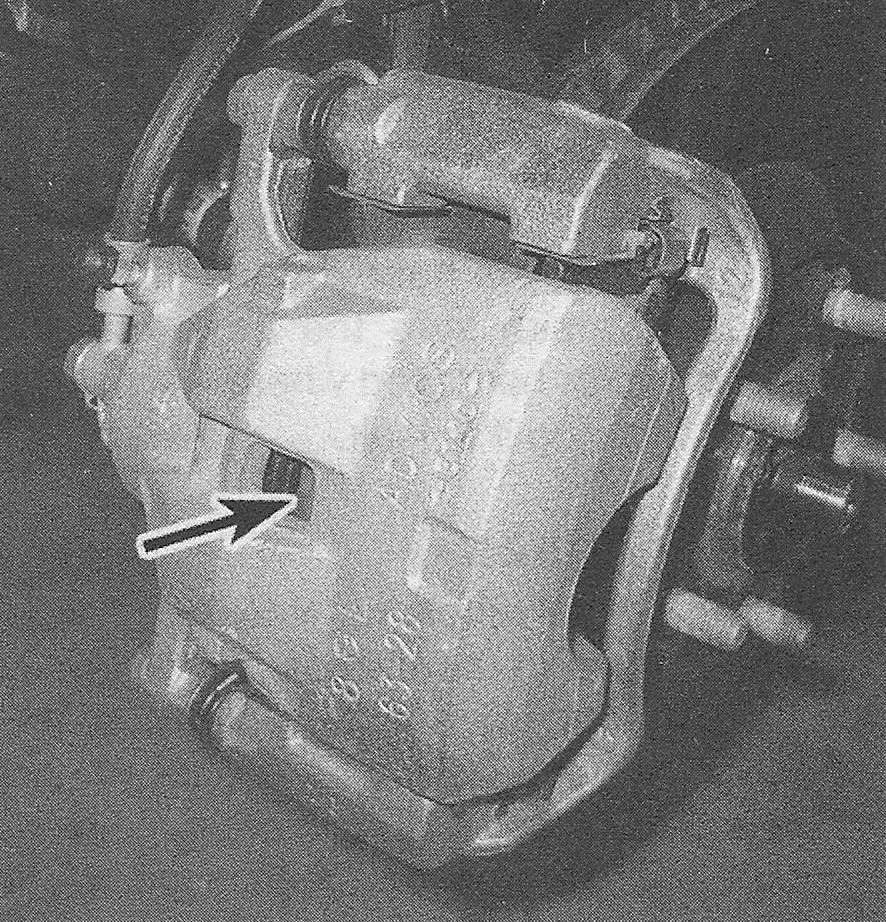
7. Check the pad thickness by looking at each end of the caliper and through the inspection hole in the caliper body. If the lining material is less than the thickness listed in this Chapter’s Specifications, replace the pads. Note: Keep in mind that the lining material is riveted or bonded to a metal backing plate and the metal portion is not included in this measurement.
8. If it is difficult to determine the exact thickness of the remaining pad material by the above method, or if you are at all concerned about the condition of the pads, remove the caliper (s), then remove the pads from the calipers for further inspection (see Brakes).
9. Once the pads are removed from the calipers, clean them with brake cleaner and re-measure them with a small steel pocket ruler or a vernier caliper.
10. Measure the disc thickness with a micrometer to make sure that it still has service life remaining. If any disc is thinner than the specified minimum thickness, replace it (see Brakes). Even if the disc has service life remaining, check its condition. Look for scoring, gouging and burned spots. If these conditions exist, remove the disc and have it resurfaced (see Chapter Brakes).
11. Before installing the wheels, check all brake lines and hoses for damage, wear, deformation, cracks, corrosion, leakage, bends and twists, particularly in the vicinity of the rubber hoses at the calipers. Check the clamps for tightness and the connections for leakage. Make sure that all hoses and lines are clear of sharp edges, moving parts and the exhaust system. If any of the above conditions are noted, repair, reroute or replace the lines and/or fittings as necessary (see Brakes).
Rear parking brake shoes
12. Rear disc brakes incorporate a drum-type parking brake into the rear discs.
13. To check the parking brake shoe lining thickness without removing the brake discs, remove the rubber plug from the front of the disc and use a flashlight to inspect the linings. For a more thorough brake inspection, follow the procedure below.
14. Refer to Chapter Brakes and remove the rear brake caliper and disc.
Warning: Brake dust produced by lining wear and deposited on brake components is hazardous to your health. DO NOT blow it out with compressed air and DO NOT inhale it!
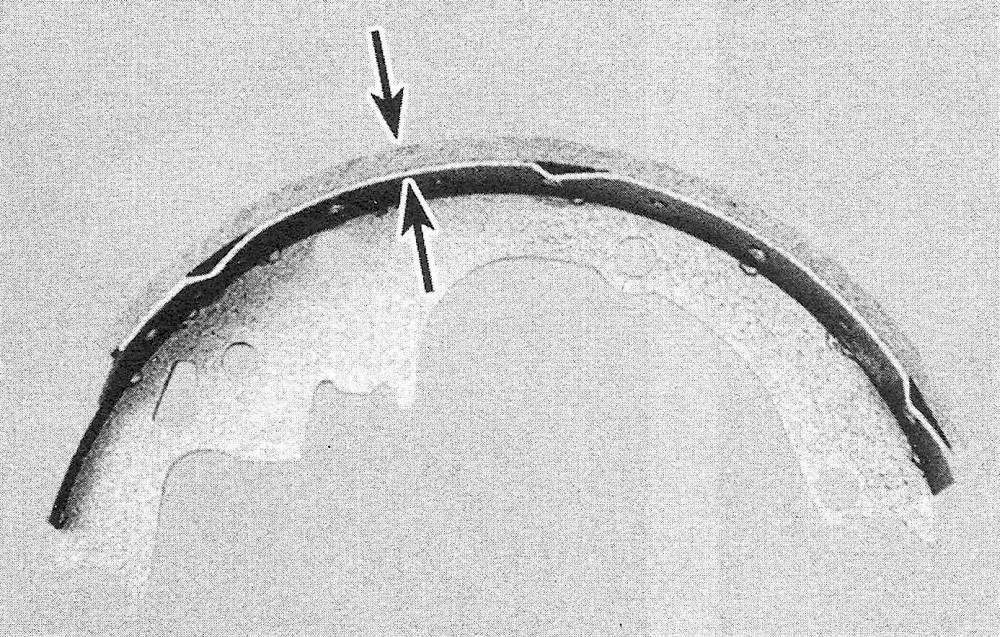
15. Note the thickness of the lining material on the rear parking brake shoes (see illustra tion). If the lining material is within 1/16-inch of the recessed rivets or metal shoes, replace the parking brake shoes with new ones. The shoes should also be replaced if they are cracked, glazed (shiny lining surfaces) or contaminated. See Chapter Brakes for the replacement procedure.
13.15 If the lining is bonded to the brake shoe, measure the lining thickness from the outer surface to the metal shoe; if the lining is riveted to the shoe, measure from the lining outer surface to the rivet head
16. Check the shoe return and hold-down springs and the adjusting mechanism to make sure they’re fitted correctly and in good condition. Deteriorated or distorted springs, if not replaced, could allow the linings to drag and wear prematurely.
17. Check the drum side of the brake discs for cracks, score marks, deep scratches and hard spots, which will appear as small discolored areas. If imperfections cannot be removed with emery cloth, the discs must be resurfaced by an automotive machine shop (see Brakes for more detailed information).
18. Refer to Chapter Brakes and install the brake rotors and calipers.
19. Install the wheels and snug the wheel nuts finger tight.
20. Remove the jack stands and lower the vehicle.
21. Tighten the wheel nuts to the torque listed in this Chapter’s Specifications.
Brake booster check
22. Sit in the driver’s seat and perform the following sequence of tests.
23. With the brake fully depressed, start the engine — the pedal should move down a little when the engine starts.
24. With the engine running, depress the brake pedal several times — the travel distance should not change.
25. Depress the brake, stop the engine and hold the pedal in for about 30 seconds — the pedal should neither sink nor rise.
26. Restart the engine, run it for about a minute and turn it off. Then firmly depress the brake several times — the pedal travel should decrease with each application.
27. If your brakes do not operate as described above when the preceding tests are performed, the brake booster is either in need of repair or has failed. Refer to Chapter Brakes for the removal procedure.
Parking brake
28. Slowly pull up on the parking brake handle or push down on the parking brake pedal and count the number of clicks you hear until the handle is up (or the pedal down) as far as it will go. The adjustment is correct if you hear the specified number of clicks. If you hear more or fewer clicks, it’s time to adjust the parking brake (see Brakes).
29. An alternative method of checking the parking brake is to park the vehicle on a steep hill with the parking brake set and the transaxle in Neutral. If the parking brake cannot prevent the vehicle from rolling, it is in need of adjustment (see Brakes).