Drivebelt check and replacement
Check
1. The drivebelts are located at the front of the engine and play an important role in the operation of the vehicle and its components. Due to their function and material makeup, belts are prone to failure after a period of time and should be inspected and adjusted periodically to prevent major damage.
2. All V6 and 2009 and earlier four-cylinder models use a single serpentine belt. 2010 and later four-cylinder models use two serpentine belts; one for the power steering pump and the other belt for the alternator, water pump and air conditioning compressor. No adjustment is necessary because an automatic tensioner (s) is used.
3. With the engine turned off, open the hood and locate the drivebelt (s) at the front of the engine. Use a flashlight to carefully check for a severed core, separation of the adhesive rubber on both sides of the core and for core separation from the belt side. Inspect the ribs for separation from the adhesive rubber and for cracking or separation of the ribs, torn or worn ribs or cracks in the inner ridges of the ribs (see illustration). Also check for fraying and glazing, which gives the belt a shiny appearance. Inspect both sides of the belt by twisting the belt to check the underside. Use your fingers to feel the belt where you can’t see it. If any of the above conditions are evident, replace the belt(s).
27.3 Check a multi-ribbed belt for signs like these — if the belt looks worn, replace it

Note: The drivebelt inspection can be made easier by removing the under-vehicle splash shield.
Replacement
Note: Take the old belt with you when purchasing new ones in order to make a direct comparison for length, width and design.
4. Disconnect the negative cable from the battery (see Engine electrical systems).
Four -cylinder engine
5. Remove the right front wheel.
6. Remove the right-side fender apron seal.
7. Remove the right-side engine cover assembly.
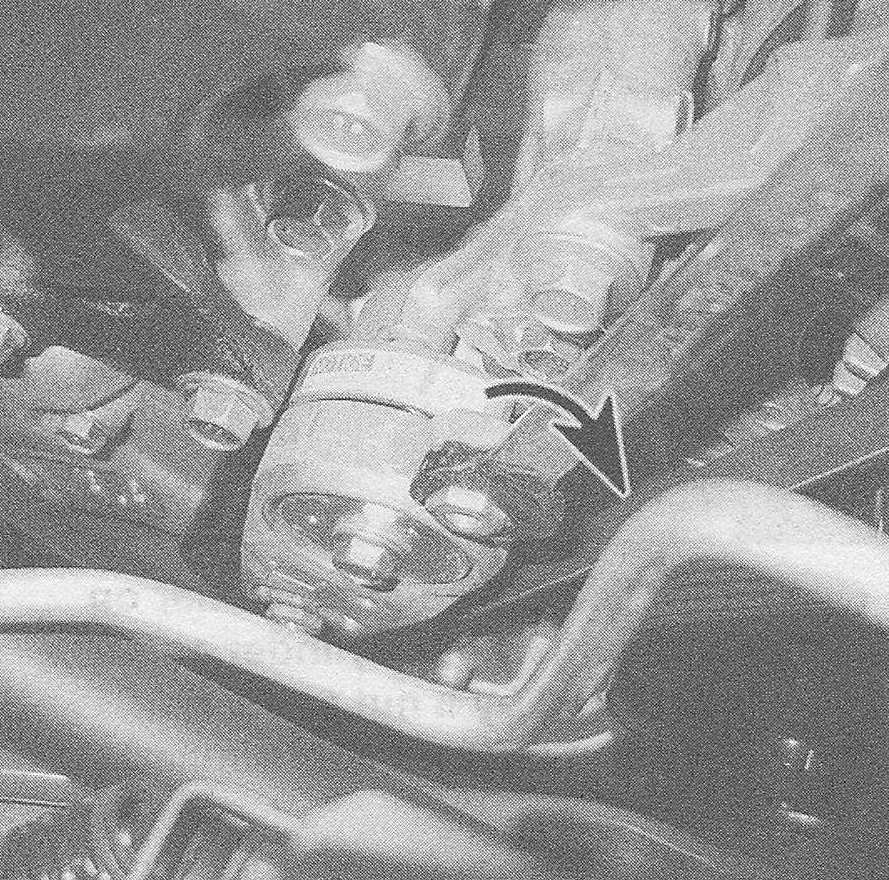
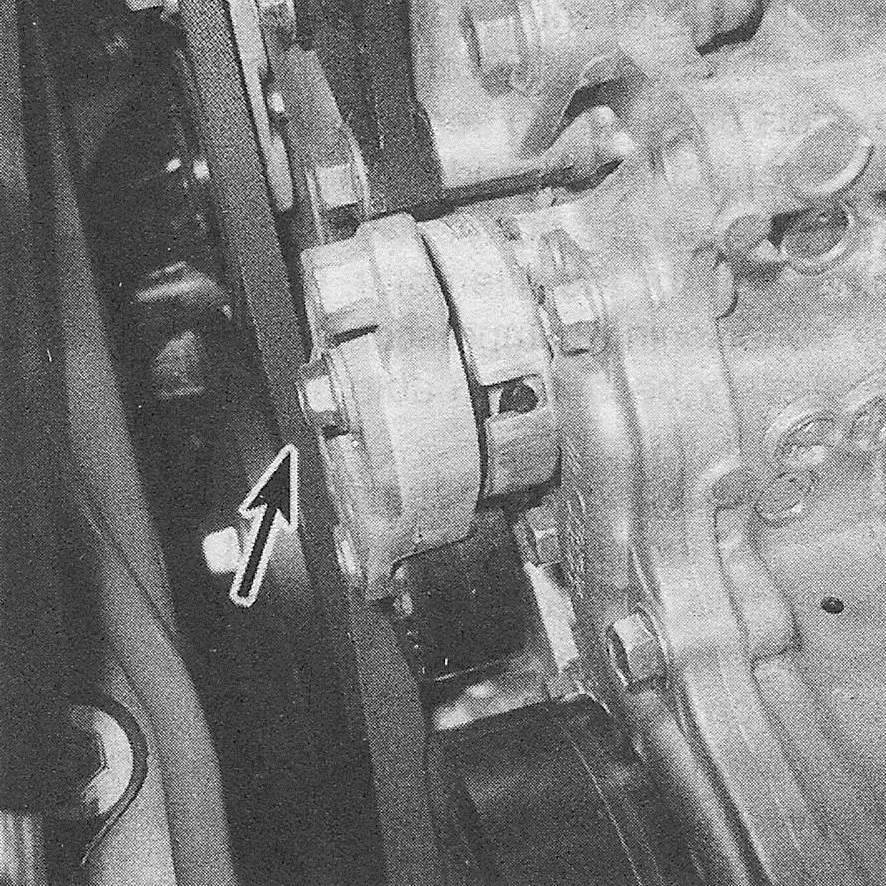
8. Place a box-end wrench on the tensioner pulley bolt (2009 and earlier models) or on the hex-shaped lug (2010 and later models), slowly turn the drivebelt tensioner away from the belt, remove the belt and slowly release the tensioner (see illustration).
27.8 Rotate the drivebelt tensioner so the tensioner pulley moves away from the belt — 2010 four-cylinder engine shown (alternator/water pump/air conditioning compressor belt)
9. 2010 and later models: If you are replacing the power steering pump belt, you will have to remove the alternator/water pump/air conditioning compressor belt first because of the way they are arranged on the crankshaft pulley. Because of this and because belts tend to wear out more or less together, it is a good idea to replace both belts at the same time. Mark each belt and its appropriate pulley groove so the replacement belts can be fitted in their proper positions.
10. Install the new belt and rotate the tensioner to allow the belt to slip over it, then release the tensioner slowly until it contacts the drivebelt. Make sure the drivebelt is centered on all of the pulleys (see illustrations).
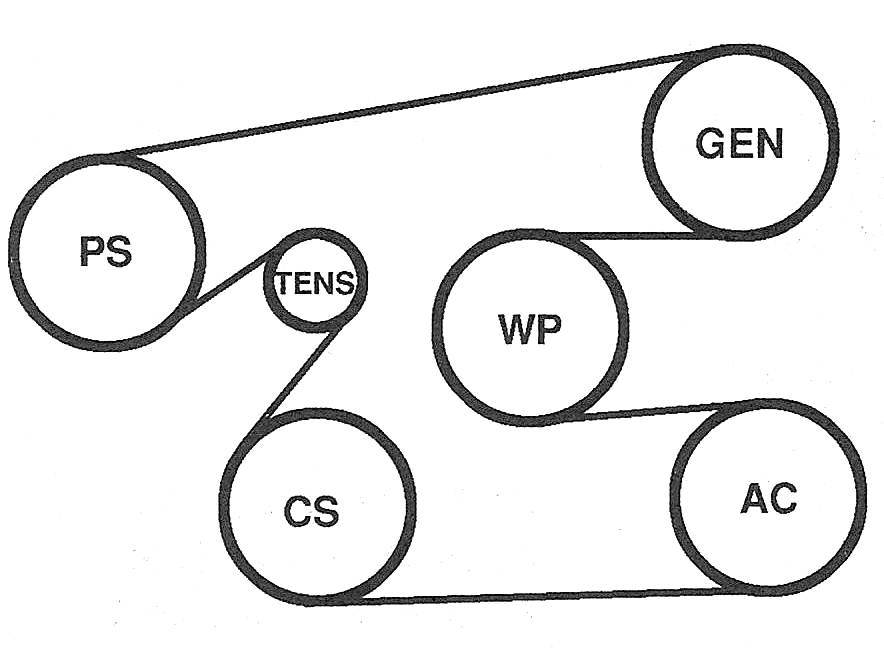
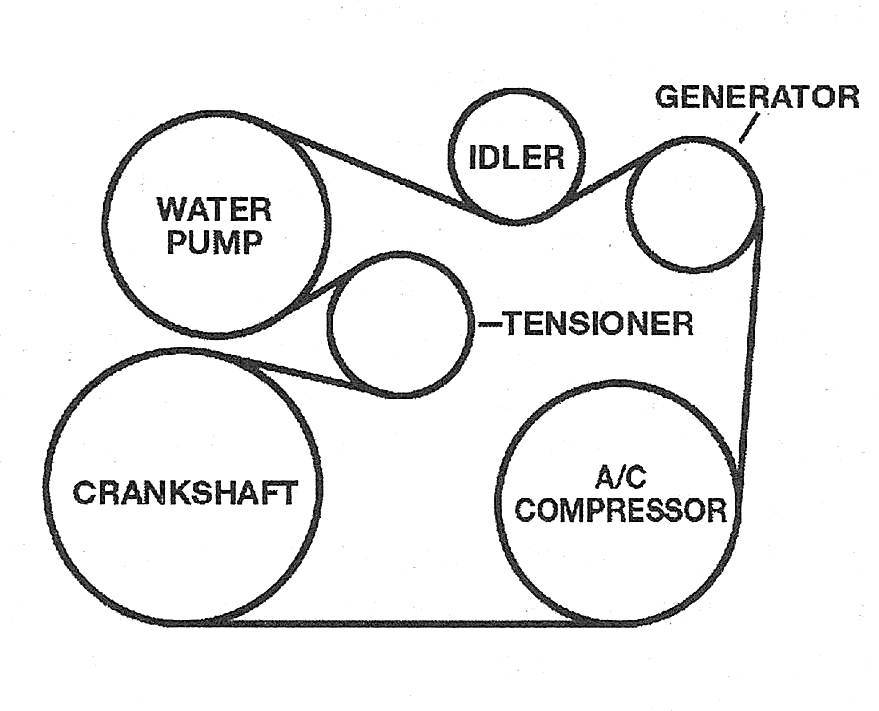
27.10a Drivebelt routing — 2009 and earlier four-cylinder engine
27.10b Power steering drivebelt routing 2010 and later four-cylinder engine

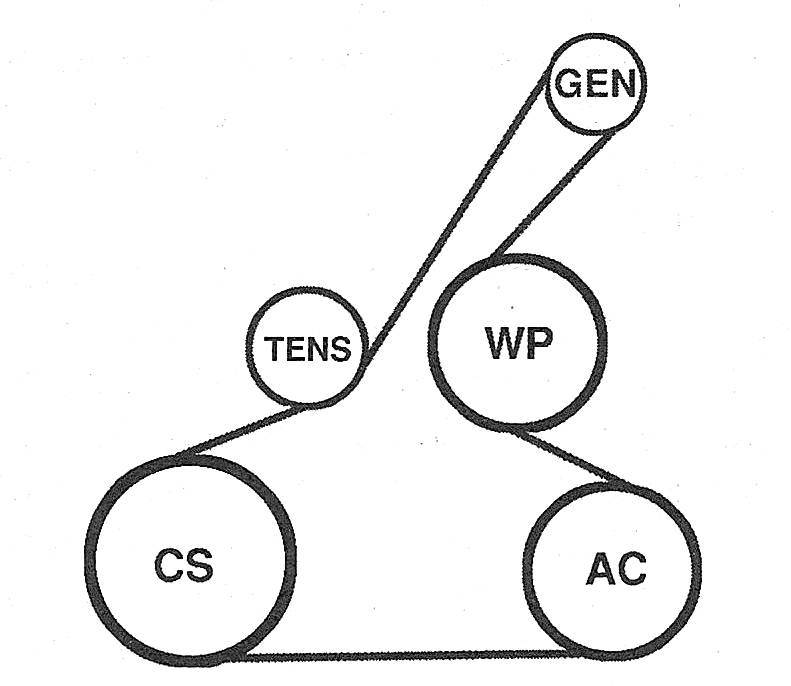
27.10c Alternator and A/C drivebelt routing — 2010 and later four-cylinder engine
V6 engine
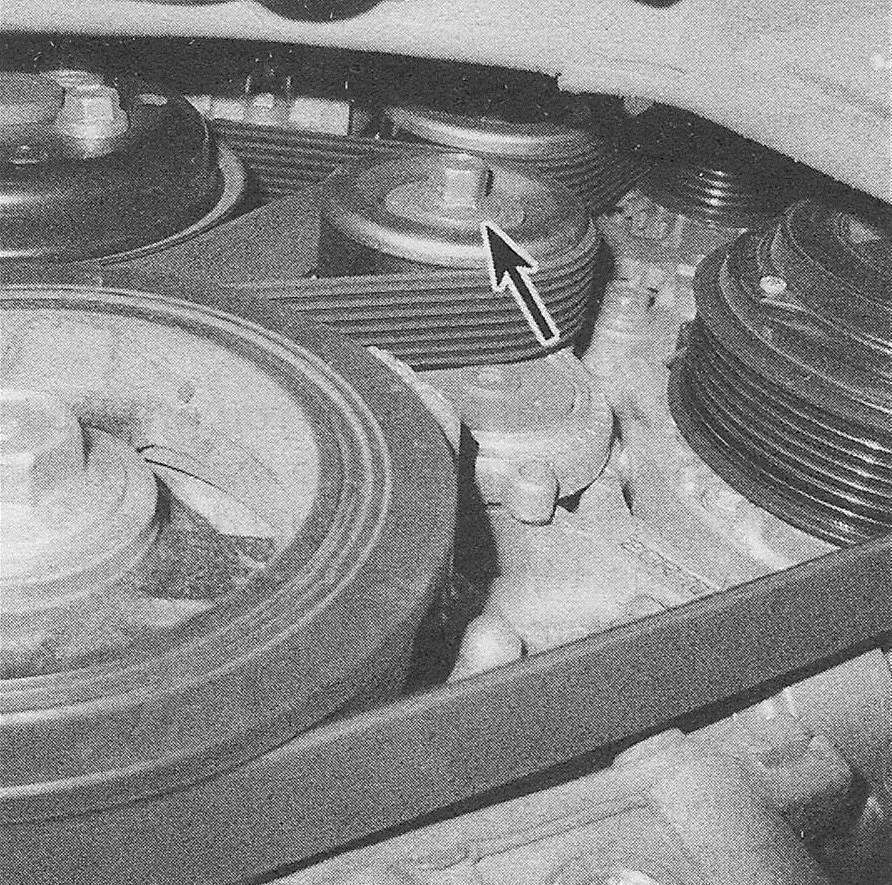
11. Place a wrench on the bolt in the center of the tensioner pulley and rotate it away from the belt to release tension on the belt (see illustration). Remove the belt and slowly release the tensioner.
27.11 Using a wrench on the center bolt of the tensioner, rotate the tensioner to loosen the belt
12. Before installing the drivebelt, lock the tensioner as follows: rotate the tensioner, align the two holes on the tensioner assembly and insert a 0.24-inch dowel pin or drill bit through the two holes.
13. Install the drivebelt. Be sure to route it correctly. Remove the dowel pin or drill bit and tension the belt. Make sure that the belt is centered on all of the pulleys.
14. Route the new belt over the pulleys (see illustration), again rotating the tensioner to allow the belt to be installed, then release the belt tensioner.
27.14a Drivebelt routing — V6 engine, 2011 and earlier models/ 2012 Avalon and ES350 models
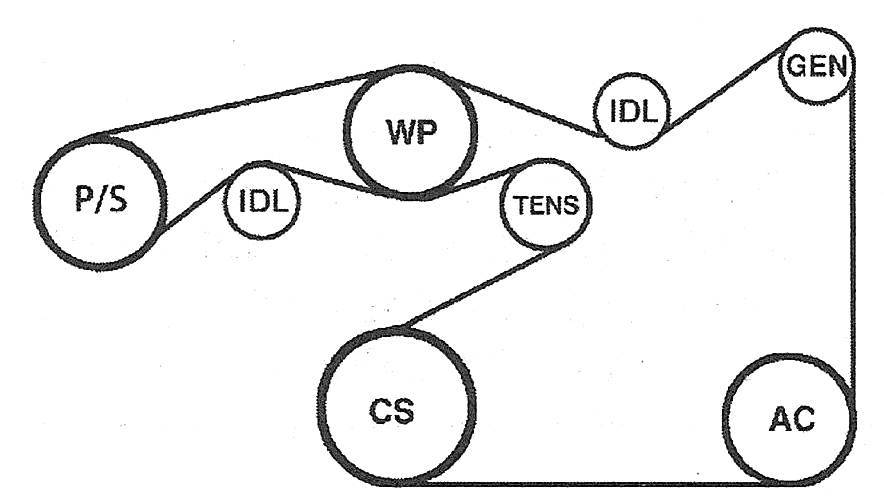
27.14b Drivebelt routing — V6 engine, 2012 and later Camry models/2013 and later Avalon and ES350 models
Note: New belts are difficult to place into position. It may be easiest to slip
the belt over the tensioner pulley and the idler pulley last as you turn the tensioner pulley.
15. Make sure the belt is properly centered in the pulleys (see illustration 27.14).
Drivebelt tensioner replacement
Warning: Disconnect the cable from the negative terminal of the battery before performing this procedure (see Battery — disconnection and reconnection).
16. To replace a tensioner that can’t properly tension the belt, or one that exhibits binding or a worn-out bearing/pulley, remove the drive-belt, then unscrew the mounting fastener (s) (see illustrations).
27.16a the drivebelt tensioner on 2009 and earlier four-cylinder engines is retained by a nut and a bolt (2010 and later models similar)

27.16b Remove the alternator drivebelt tensioner on 2010 and later four-cylinder models by removing the mounting bolt and tensioner; the power steering drivebelt tensioner removal is similar
17. Installation is the reverse of the removal procedure, be sure the locking pin is seated into the housing. Tighten the fasteners to the torque values listed in this Chapter’s Specifications.
18. Install the drivebelt.