Oil pump — removal, inspection and installation
Removal
1. Remove the timing chain cover (see Timing chains and sprockets — removal, inspection and installation). The oil pump is on the inside of the cover.
2. Remove the relief valve plug using a 27 mm socket. Slide out the spring and the relief valve.
3. Remove the oil pump cover bolts and remove the oil pump cover. Remove the oil pump drive rotor and driven rotor.
Inspection
4. Clean all components with solvent, then inspect them for wear and damage. Check that the oiled relief valve falls easily through its bore without sticking.
5. Check the oil pressure relief valve sliding surface and valve spring. If either the spring or the valve is damaged, they must be replaced as a set.
6. Check the clearance of the following components with a feeler gauge and compare the measurements to this Chapter’s Specifications (see illustrations):
- ) Driven rotor-to-oil pump body
- ) Rotor side clearance
- ) Rotor tip clearance
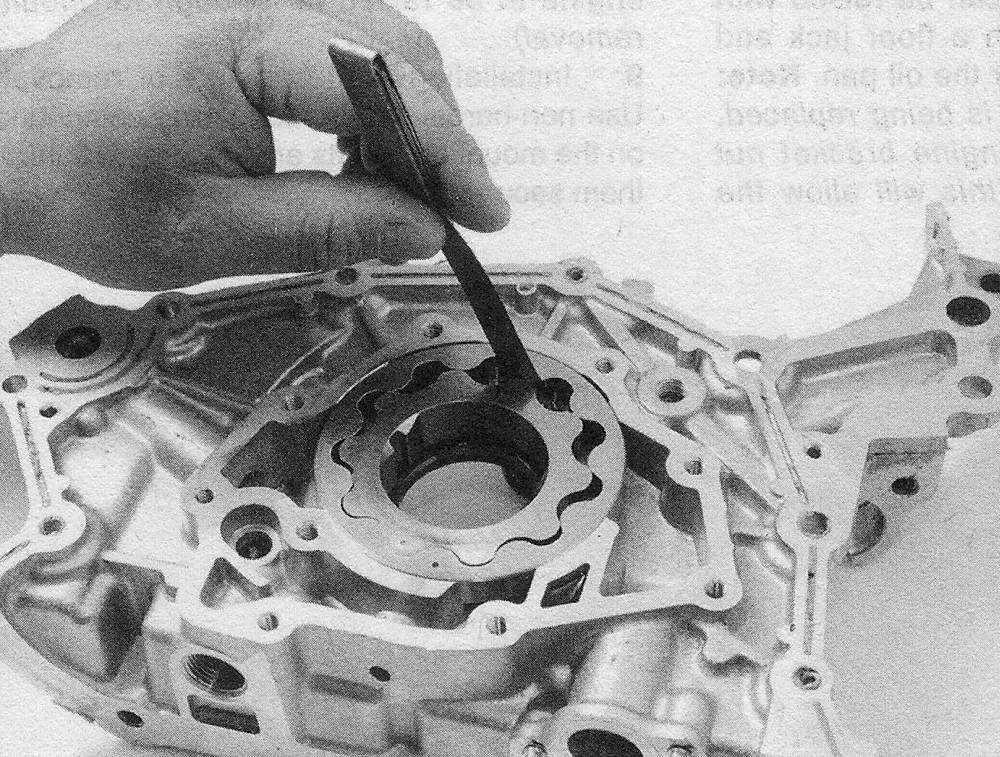
12.6a Measure the driven rotor-to-body clearance with a feeler gauge

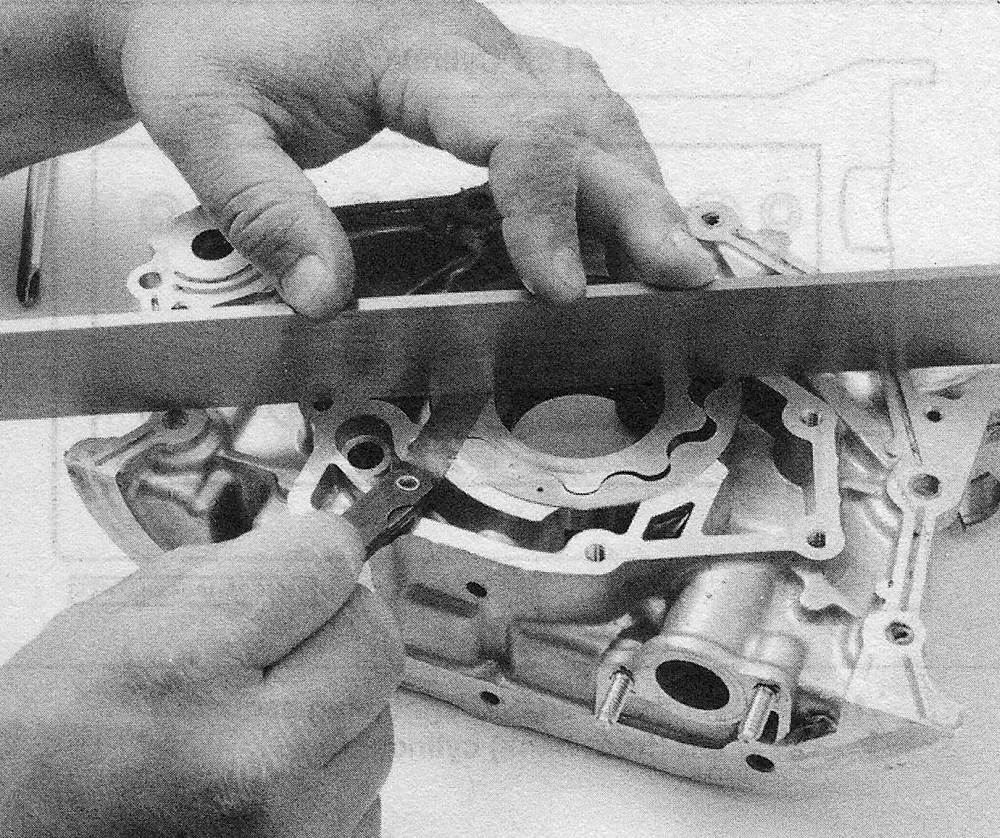
12.6b Measure the rotor side clearance with a precision straightedge and feeler gauge
12.6c Measure the rotor tip clearance with a feeler gauge – note the rotor marks are facing out (when the pump body cover is installed, the marks will be against the cover)
7. Replace any worn parts or replace the entire oil pump assembly.
Installation
8. Pry the old crankshaft seal out of the timing chain cover with a screwdriver.
9. Apply multi-purpose grease or engine oil to the outer edge of the new crank seal and carefully drive it into place with a deep socket and a hammer. Apply multi-purpose grease or engine oil to the seal lip.
10. Apply a coat of petroleum jelly to the pump drive and driven rotors, then place the two rotors into position in the timing chain cover. Make sure that the pump marks (dimples) are facing out, toward the pump cover and away from the timing chain cover.
11. Pack the pump cavity with petroleum jelly (this will help to prime the pump) and install the cover. Tighten the cover bolts to the torque listed in this Chapter’s Specifications.
12. Lubricate the oil pressure relief valve with clean engine oil and insert the valve, then the spring, into the pump cover. Screw in the plug and tighten it to the torque listed in this Chapter’s Specifications.
13. Install the timing chain cover (see Timing chains and sprockets — removal, inspection and installation).
14. The remainder of installation is the reverse of removal. Add oil and install a new filter (see Tune-up and routine maintenance). Run the engine and check for leaks.