Valve covers — removal and installation
1. Disconnect the cable from the negative terminal of the battery (see Engine electrical systems).
2. Remove the windshield wiper arms, side seals and plastic cowl (see Chassis electrical system).
3. Remove the wiper motor and linkage (see Chassis electrical system).
4. Remove the cowl assembly (see Body).
5. Pull up on the front side of the engine top cover to detach it from the two front retainers. After the front is detached, pull up on the back retainer and remove the engine cover.
Cau tion: Do not pull up on the front and rear at the same time or the cover can be damaged.
6. Disconnect the hose from the PCV valve.
7. Remove the upper intake manifold (see Fuel and exhaust systems).
8. Remove the ignition coils (see Engine electrical systems). Disconnect the wiring from the sensors and actuators and secure the wiring harnesses out of the way.
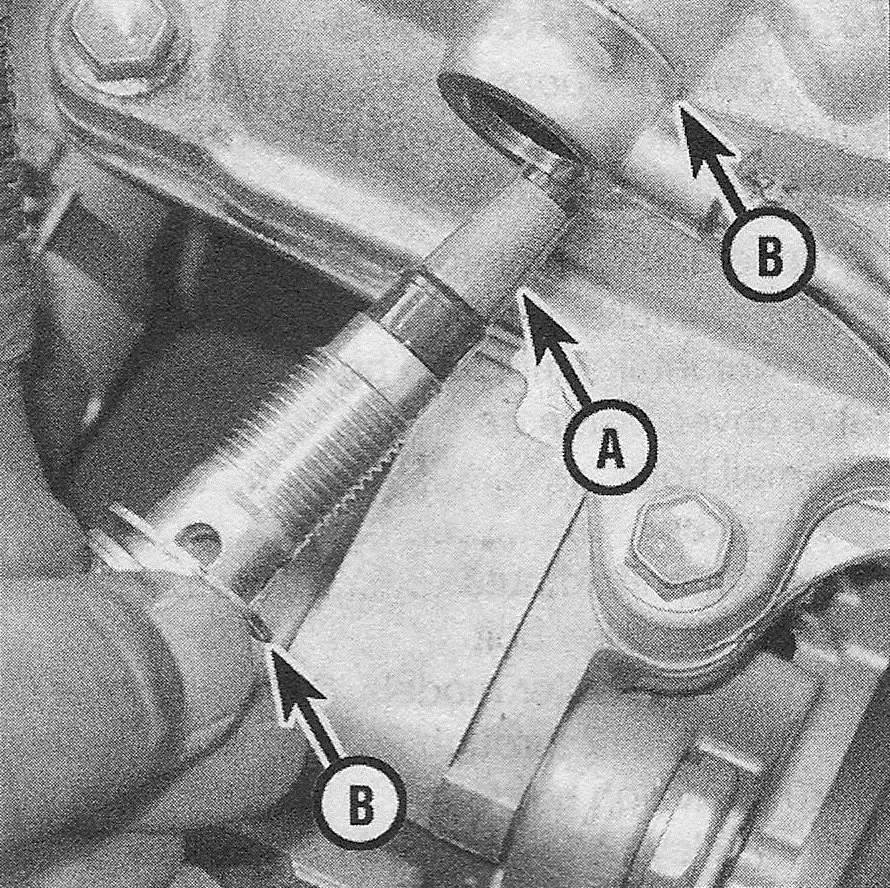
9. Disconnect the oil line from the end of each valve cover (see illustration). Carefully set aside the oil control valve filter when you remove the upper banjo bolt from the valve cover. The sealing washers should be replaced with new ones if they’re worn.
4.9 Take care with the oil filter (A) and the sealing washers (B) when disconnecting the oil line from the valve cover
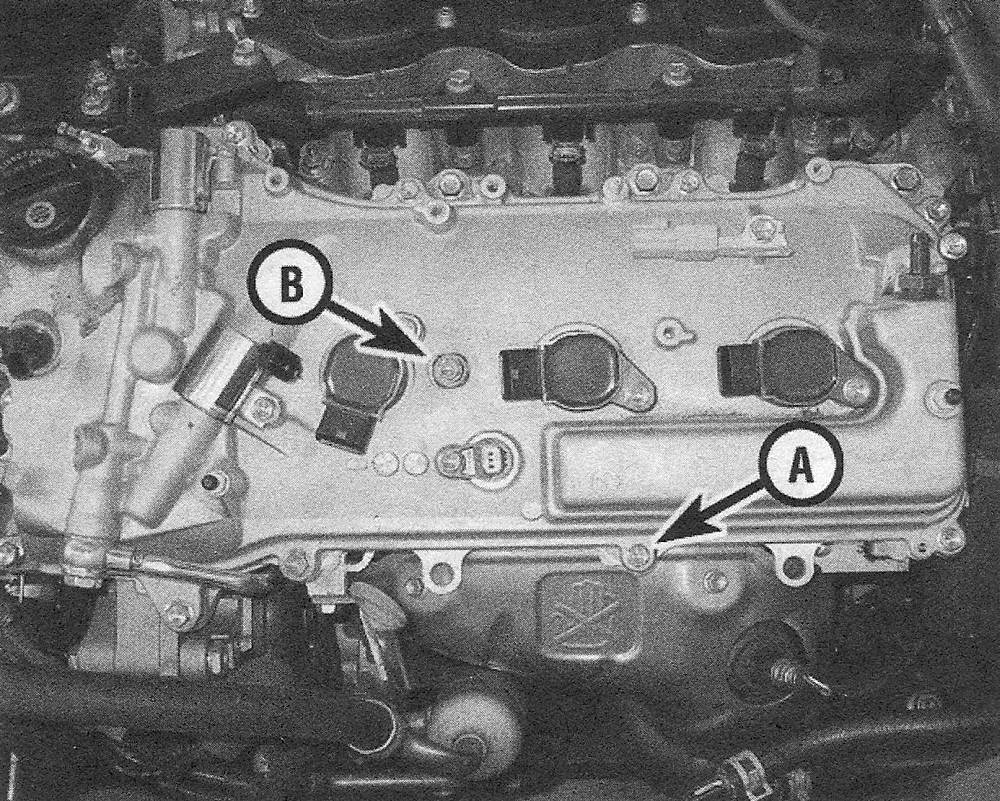
10. Remove the valve cover bolts and remove the valve cover (see illustration).
4.10 The valve cover is retained with 11 perimeter bolts (A) and a central bolt (B)
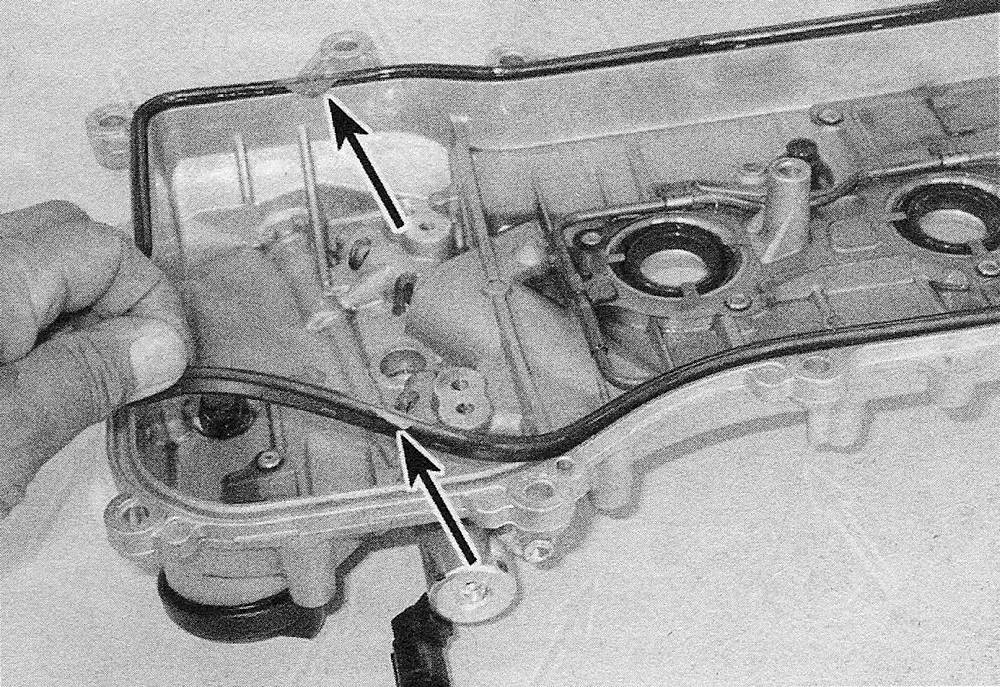
11. Check the three small round interior gaskets as well as the large perimeter gasket (see illustration). They should be replaced with new ones if they show signs of deterioration.
4.11 Make sure that the gasket is fully seated into the valve cover groove, and that the spark plug tube seals are seated as well;
arrows indicate areas where sealant was applied on the joint between the timing chain cover and the cylinder head clean old sealant from the gasket before reusing it
12. Installation is the reverse of removal. Thoroughly clean all sealing surfaces prior to putting the new gaskets in place.
13. Apply dabs of RTV sealant to the joints where the timing chain cover meets the cylinder heads.
14. Evenly tighten the valve cover nuts and bolts to the torque listed in this Chapter’s Specifications.
15. Start the engine and check for oil leaks around the edges of the valve cover.